Can You Repair a Limestone Floor?

limestone-floor-care-restoration-repair-nyc

Limestone is a popular choice for flooring due to its beauty and durability. However, limestone floors are not indestructible. Between consistent foot traffic, temperature changes, scratches, spills, staining, or even accidentally dropping heavy items, limestone floors can become chipped and damaged over time. If your limestone floor has been compromised, you may be wondering if it’s possible to repair it or if you’ll simply have to replace it.

The good news is that depending on the extent of the damage, it’s highly possible to repair your existing limestone floors rather than Let’s discuss all the essential information you need to bring your floor back up to its full potential.

How to Repair a Limestone Floor

For best results, the following process should only be completed by a trained stone care professional. However, these are the steps our technicians at NYC Statewide Stone Care typically follow when doing a limestone floor repair.

Vacuum or Sweep Up Cracked Debris

First, vacuum or sweep up any cracked debris on the floor, not only to prevent injury but also to prevent additional damage. Use a gentle motion and proper cleaning tools to avoid disturbing the other unaffected parts of the limestone floor. If your stone is polished and prone to scratching, be extra-cautious and use a soft-bristled broom or an upholstery attachment. Don’t use a vacuum with a beater brush as this may cause additional scratching as the debris moves on the floor.

Remove the Old Grout

Removing the old grout from limestone floor tiles can be a messy and time-consuming job, but it is an important step in the repair and restoration process of any limestone floor. First, use a small chisel to chip away any bits of grout that remain in the joints surrounding the tiles. Once you have removed all of the easier accessible pieces of grout by hand, cover up other areas with cloth or paper in order to protect them. Then, saturate the joints intently with liquid tile cleaner for about 10 minutes before continuing to drill out any remaining pieces of grout with carbide masonry drill bits. Be sure to keep your slow-speed drill steady and regulated at all times so as to not damage any tiles during this process. Another key part of this procedure is having good ventilation because drilling releases dust into the air. After you are finished, thoroughly clean and rinse off the stone floor using soft-bristle brushes and a pH-neutral cleaner.

Re-Grout the Floor

Once the floor is clean and dry it’s time to apply new grout. Start by vacuuming the grout lines to remove any remaining dust or debris. You may also want to apply masking tape to painted walls to protect them from stray grout; you can also apply masking tape around the joints to keep grout off the limestone floor tiles, but if the tiles have been recently sealed, you may just be able to clean the excess tile as you go. Next, apply new grout with a putty knife, directly into grooves between tiles. Wipe away any excess grout and allow the area to dry for an appropriate amount of time.

Repair Chips and Cracks with Epoxy

The next step in the process is to repair any chips and cracks that appear in the limestone. This is accomplished by utilizing a special epoxy that is expertly color-matched to your floor so when the repairs are complete, you won’t be able to tell the epoxy apart from the floor itself. (Again, trust the pros to complete this process.)

Polish the Floor

Next, you’ll want to apply a pro-level polish to the entire limestone floor. This not only removes excess traces of grout, but it also hones the epoxied repairs so that the finish matches the rest of the floor. Make sure you have a polishing powder and sealant that are specifically formulated for limestone. Our experts use a variety of light abrasives to create an even finish across the entire floor.

Seal the Floor

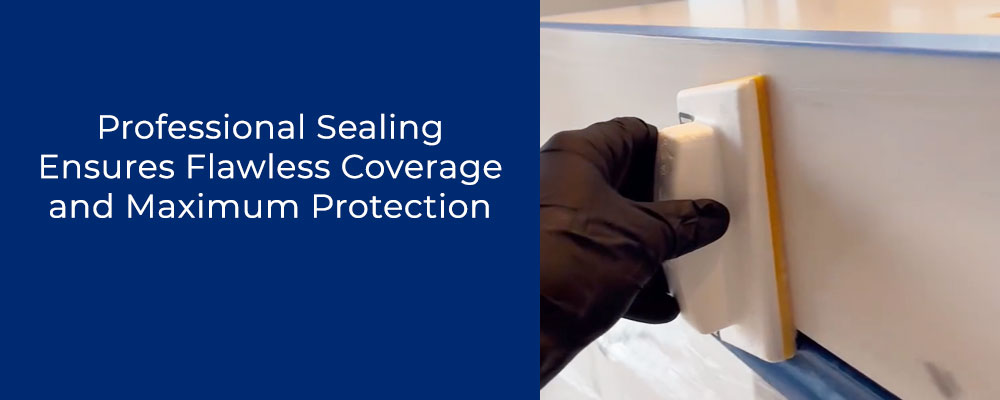
Finally, to protect the limestone floor from future staining and water damage, you’ll want to apply a sealant that is specificified for limestone floors. The sealant should be distributed evenly across the entire floor to avoid the “hazed” look of excessive sealant.

Consult with a Stone Care Professional

Limestone can be a tricky material to work with, so to make sure the job is done right, it’s always best to consult with a stone care professional whenever repairs are needed to ensure that your limestone floor is properly restored and will last you for years to come. At Statewide Stone Care, we have many years of experience in the Tri-State area repairing limestone floors, as well as other natural stone and tile floors, to the point that you won’t even be able to see the damage. If you’ve got damage limestone floors contact us today for a free evaluation and estimate for repairs.

How Often Should You Seal Your Countertops?

how-often-seal-countertops-blog

Having natural stone countertops in your kitchen or bath can be a beautiful way to add value and luxury to your home. But stone surfaces are also porous, which means that moisture can seep into the stone, eventually causing staining and discoloration over time from everyday use. If that happens, the problem typically has to be fixed by refinishing the surface. Applying a sealant periodically can prevent this issue and extend the life of your stone. Stone sealers add a barrier of protection so moisture can’t seep into the stone underneath, thereby preventing staining. The question is: how often should you seal your countertops?

The answer is different for everyone because a number of factors are involved. Granite and marble sealing, for example, should happen at a different rate than limestone or travertine. Let’s take a closer look at these factors so that you can determine when it’s time to reseal your granite, marble, or other stone and tile counters for optimal protection.

Factors to Consider When Sealing Your Countertops

Let’s start by looking at the individual factors that can increase or decrease the rate of wear-and-tear on various natural stone surfaces.

Type of stone. The type of stone you have affects the frequency with which you need to seal it. Harder stones like granite and slate are denser and less porous than softer stones such as limestone and marble. Therefore, granite surfaces generally require sealing less often than their softer counterparts.

Color/shade of the stone. As a rule of thumb, lighter-colored stone surfaces tend to be more porous and require resealing more often–even among countertops of the same type of stone. Plan on resealing a lighter-colored granite countertop more frequently than a dark granite slab, for example.

Amount of use. How often you use your countertops can also affect how quickly sealant wears off. High-use areas such as kitchen counters, bathroom vanities, and bar tops may require more frequent sealing than surfaces used only occasionally.

Type of sealant. Some sealants are designed to last longer than others; however, they can be more expensive. If you’re using a lower-grade sealant, you may need to reapply it more often.

Frequency of cleaning. If you tend to leave spills and water droplets standing on the countertop, this can wear down the sealant more quickly. You can make the sealer last longer by cleaning spills as they happen and by cleaning your granite, marble or travertine countertops regularly with gentle dish soap and water, then drying the excess water quickly so it doesn’t stand on the surface.

Environment. Outdoor kitchens with stone countertops must be resealed more often than countertops indoors, for example, due to the wear-and-tear of the elements, the freeze-thaw cycles of wintertime, etc.

How to Tell When It’s Time to Reseal Your Stone Countertops (The Water Test)

Many home and business owners assume “more is better” when it comes to resealing, but that’s not always the case. Over-sealing with multiple layers can actually leave your stone surfaces with an unattractive “hazed” look that is difficult to remove.

The best way to tell when your countertops need to be resealed is the “water test.” Here’s how it works: simply pour a tablespoon of water onto your stone countertop and wait about 30 minutes. If the water beads up on the surface, you’re good–the sealant is still there and doing its job. If, however, the water is absorbed into the stone and darkens it, then you know it’s time to seal your stone.

How Often Each Type of Stone Countertop Should be Sealed

Remember, there’s no hard and fast rule for how often you should re-seal your stone countertops. All different factors need to be considered, including how much use the countertops get, whether the countertops are indoors or outdoors, etc. That said, the following are some general recommended ranges for how often to have a sealant reapplied. Plan on more frequent resealing for high-use or outdoor surfaces, and less frequent for low-use, indoor surfaces, and so on.

Marble

Marble is one of the most popular stone surfaces, but it’s also higher maintenance due to its porosity and light color. For regular use, plan to schedule marble resealing every 3-6 months.

Granite

Granite is one of the densest and least porous of the natural stones used for countertops. You can plan to seal your granite countertops about once every 1-2 years.

Slate

Like granite, slate is a dense and fairly non-porous stone. For best results plan on resealing every 1-2 years depending on usage.

Limestone

Limestone tends to be light, soft, and very porous, similar to marble. Plan on resealing at least once a year, or every six months with heavy use.

Travertine

Travertine countertops tend to be dense, durable, and low-maintenance. Resealing every 1-2 years usually works for these countertops.

Are Your Countertops Ready to Be Sealed?

Many stone sealing products are available for do-it-yourselfers, but for the best finish and an even, long-lasting seal, it’s best to have the sealant applied by a trained stone care professional. At Statewide Stone Care, our technicians are highly trained in sealing all types of natural stone, including granite and marble sealing, slate, limestone, and others. We can also do a free evaluation of your stone countertops to give more specific advice on how often you should schedule re-sealing based on the type of stone and the amount of use. For a free estimate, contact us today.

Can Anti-Etch Prevent Etching and Staining of Your Countertops?

Why do we love marble, travertine, or other types of natural stone countertops in our homes and businesses? The simple answer is that we love the beauty and elegance these surfaces add to the space, plus their durability over time. But at the same time, these stone surfaces can be costly to restore if they are stained, etched, or damaged–so we tend to worry constantly about using them! MORE™ Anti-Etch™ is a product that’s supposed to eliminate this worry by preventing etching and staining of your countertops–but does it really work?

Depending on the type of counters you have, the answer is a clear YES. Let’s discuss this question further.

What is Anti-Etch?

MORE Anti-Etch is a product that, when applied to natural limestone-based surfaces, provides a crystal clear, ultra-thin protective barrier that prevents etching and staining from acidic substances like wine, tomato sauce, vinegar, etc. It also makes the surface more resistant to dirt and other wear-and-tear damage. Anti-Etch can be applied on marble, travertine, limestone, onyx, and even concrete, and it’s available for honed, polished, and leathered surfaces. It is an environmentally friendly compound (no VOCs), and it’s safe for all food-grade surfaces. Best of all, it’s long-lasting. Just one application and your counters are protected for up to 10 years!

What Is Etching?

Etching is a type of damage caused by acidic substances that seep into the stone surface and eat away at it. Limestone-based surfaces are particularly vulnerable to acids and bases because they react with the calcium carbonate in the stone, forever changing it. Etches leave behind microscopic “pits” in the surface, which create an uneven discoloration to the countertop that may look like staining, but is actually permanent damage. Once etching occurs, the only way to remove it is by refinishing or restoring the countertop–grinding down the stone to remove the damage and honing it back to the desired sheen.

What makes MORE Anti-Etch so powerful is that it follows the maxim, “An ounce of prevention is worth a pound of cure.” By applying Anti-Etch, you stop etching before it ever starts.

How Anti-Etch Protects Your Countertops

MORE Anti-Etch is more than just a sealant. It forms an invisible barrier on the surface of your counters that prevents acids, bases, and other corrosive substances from coming into contact with the stone. This makes it impossible for etching to occur, even with repeated spills or everyday use. If the acid can’t touch the stone, it can’t react with it. The barrier is so strong that you can leave spills sitting indefinitely without fear or worry! (Not that you would.)

But this invisible barrier does even more to protect your counters than just protect from etching. It also provides protection on the microscopic level from dirt and grime, making the stone surface more resistant to scratching. It also makes your counters hygienically safer because Anti-Etch is completely non-porous–meaning bacteria and germs have nowhere to take hold!

How Long Does Anti-Etch Last?

MORE Anti-Etch is designed to last for up to 10 years with proper application and with normal use. That means that once your stone service professional has applied it to your counters, you can use your marble and other stone surfaces worry-free for up to a decade! And Anti-Etch is easy to reapply; all it takes is a light buffing and a fresh coat of the product, and your counters are set for the next 10 years.

Want to Protect Your Counters?

You installed your stone counters so that you could enjoy them for many years to come: why be afraid to use them? With MORE Anti-Etch, that worry becomes a thing of the past.

For best results, MORE Anti-Etch should only be applied by a trained stone restoration contractor. At Statewide Stone Care, our technicians are highly experienced in all aspects of stone and tile care, restoration, refinishing, and protection in New York and New Jersey–including proper application of MORE Anti-Etch. And if your stone surfaces have already sustained damage, we can perform a complete restoration and refinishing on them to make them as good as new, then apply MORE Anti-Etch to make sure they stay that way. For a free estimate, contact us today.