Historic Stone Restoration at Temple Emanu-El in New York City

August 14, 2026 | By Anthony

Restoring a New York City Landmark: Historic Stone Restoration at Temple Emanu-El

Located on Fifth Avenue at East 65th Street in Manhattan, Temple Emanu-El is one of New York City's most remarkable religious and architectural landmarks. Statewide Stone Care is proud to be participating in the restoration of historic natural stone surfaces throughout this extraordinary building, combining specialized stone craftsmanship with the precision and care required for a nearly century-old interior.

Temple Emanu-El Fifth Avenue New York City exterior

Temple Emanu-El at Fifth Avenue and East 65th Street in Manhattan, one of New York City's most significant religious and architectural landmarks.

1. A Landmark on Fifth Avenue

Congregation Emanu-El has been part of New York's history since the nineteenth century. Its present home at Fifth Avenue and East 65th Street was constructed in the late 1920s and completed in 1929, creating one of Manhattan's most recognizable houses of worship.

Designed on a monumental scale, the building combines powerful architectural forms with extraordinary craftsmanship. Natural stone, decorative mosaics, metalwork, stained glass, richly finished surfaces and intricate ornamentation create an interior in which materials are an essential part of the architecture.

Working inside a building of this importance requires a restoration philosophy that goes beyond simply improving appearance. Every phase must respect the surrounding historic materials and preserve the architectural character that has defined the building for generations.

Main Sanctuary Temple Emanu-El New York City

The monumental Main Sanctuary of Temple Emanu-El, where natural stone, mosaic, metalwork, wood and architectural ornament come together on an extraordinary scale.

2. Natural Stone as Part of the Architecture

Natural stone is an essential part of Temple Emanu-El's architectural identity. Throughout the interior, different colors, patterns, textures and finishes help define ceremonial spaces, corridors, stairways and transitional areas.

Historic stone installations present a very different restoration challenge from modern flooring. Decades of foot traffic, previous maintenance procedures, scratches, surface wear, localized damage and earlier repairs can gradually alter the appearance of the material.

The objective of a preservation-focused restoration is therefore not simply to make old stone appear new. It is to restore clarity, consistency and finish while respecting the visual character and age of the original material.

Historic Restoration Requires a Different Approach

In a historic property, successful stone restoration must balance cleaning, repair and refinishing with preservation. Each surface is evaluated individually so that the restoration improves its condition without unnecessarily removing or altering original material.

3. Understanding the Existing Condition

Before restoration begins, the stone must be carefully evaluated. High-traffic historic floors can contain scratches, worn areas, staining, small holes, pits, chips, previous repairs and significant differences in surface finish.

Some of these conditions become visible only at close range. Identifying them allows the restoration process to be adapted to the needs of the individual surface instead of applying one aggressive treatment throughout the entire installation.

Historic natural stone floor condition before restoration at Temple Emanu-El

A close view of the existing historic stone surface reveals localized wear and imperfections that require detailed evaluation and treatment.

4. A Detailed Restoration Process

Historic stone restoration is rarely a single-step procedure. Individual areas may require different levels of attention depending on the type of stone, existing finish, amount of wear and condition of previous repairs.

The challenge is not merely to correct individual defects. Once the work is complete, localized repairs and refinished areas must integrate visually with the surrounding original stone so that the architecture can once again be experienced as a unified composition.

1. Condition Assessment

Existing wear, previous repairs, surface inconsistencies and damaged areas are reviewed before the restoration sequence is established.

2. Localized Stone Repair

Individual imperfections are addressed according to their condition, with careful attention to the surrounding historic material.

3. Surface Refinement

The stone surface is progressively refined to improve consistency, clarity and overall appearance while maintaining the character of the original installation.

4. Final Detailing

Edges, transitions and areas surrounding sensitive architectural elements require detailed finishing so that the completed work integrates naturally throughout the space.

5. Protecting Historic Architectural Elements

Restoration inside Temple Emanu-El requires careful protection of much more than the stone itself.

Decorative metalwork, bronze, woodwork, doors, wall finishes and other adjacent architectural components must remain protected throughout the different phases of work. Proper masking and containment allow technicians to perform detailed restoration while minimizing risk to surrounding finishes.

Historic architectural protection during stone restoration Temple Emanu-El

Protection and containment around adjacent architectural elements allow stone restoration to be performed within the historic interior with precision and control.

Protected brass architectural detail during stone restoration

Decorative metal and surrounding historic finishes are carefully masked and protected while nearby stone surfaces are being restored.

Preservation Is in the Details

Historic stone restoration is as much about what is protected as what is restored. Working around original architectural materials requires patience, controlled procedures and careful attention to every transition between surfaces.

6. Restoring Depth, Clarity and Character

As natural stone experiences decades of traffic and maintenance, its visual depth can gradually diminish. Scratches, uneven wear and deterioration scatter light differently across the surface, causing portions of the floor to appear flat, cloudy or inconsistent.

Through a controlled professional restoration process, the surface can be progressively refined to create a more consistent finish while bringing back the natural movement, variation and depth of the stone.

The result is not simply a shinier floor. Proper restoration allows the characteristics of the stone itself to become visible again and contribute naturally to the surrounding architecture.

Temple Emanu-El historic stone floor during restoration During Restoration

Historic stone flooring during the restoration process, before the final surface refinement and detailing stages.

Restored historic stone floor Temple Emanu-El New York Restored Finish

The restored surface reveals greater clarity, depth and definition throughout the natural pattern of the stone.

7. Working Within the Sanctuary

Few environments demonstrate the importance of precision more clearly than the sanctuary at Temple Emanu-El.

Stone surfaces exist immediately alongside historic railings, ceremonial areas, decorative architectural elements, walls and highly detailed finishes. The restoration must therefore be carefully coordinated within the existing architecture rather than approached as an isolated flooring project.

Historic stone restoration beside sanctuary at Temple Emanu-El

Stone restoration within the sanctuary requires precise work immediately alongside historic railings and highly detailed architectural finishes.

8. Preserving Nearly a Century of Craftsmanship

The architects, stone setters, craftsmen and artists who created Temple Emanu-El nearly a century ago produced an interior intended to endure for generations.

Today's restoration work becomes another chapter in that history.

For our team at Statewide Stone Care, participating in the restoration of Temple Emanu-El represents more than another natural stone project. It is an opportunity to apply specialized stone-care knowledge within one of New York City's most extraordinary architectural environments.

From detailed localized treatment to the restoration of expansive historic floor areas, every phase requires patience, precision and respect for the original material.

Preserving New York's Architectural Legacy

Statewide Stone Care provides specialized natural stone restoration for historic, institutional, commercial and high-end properties throughout New York, New Jersey and Connecticut.

From marble and limestone restoration to detailed repair, refinishing and long-term stone maintenance, our team develops solutions around the unique requirements of each property.

Discuss Your Restoration Project
```

Natural Stone Repair

May 18, 2026 | By Anthony

Natural Stone Repair: Professional Restoration Across NYC, NJ & CT

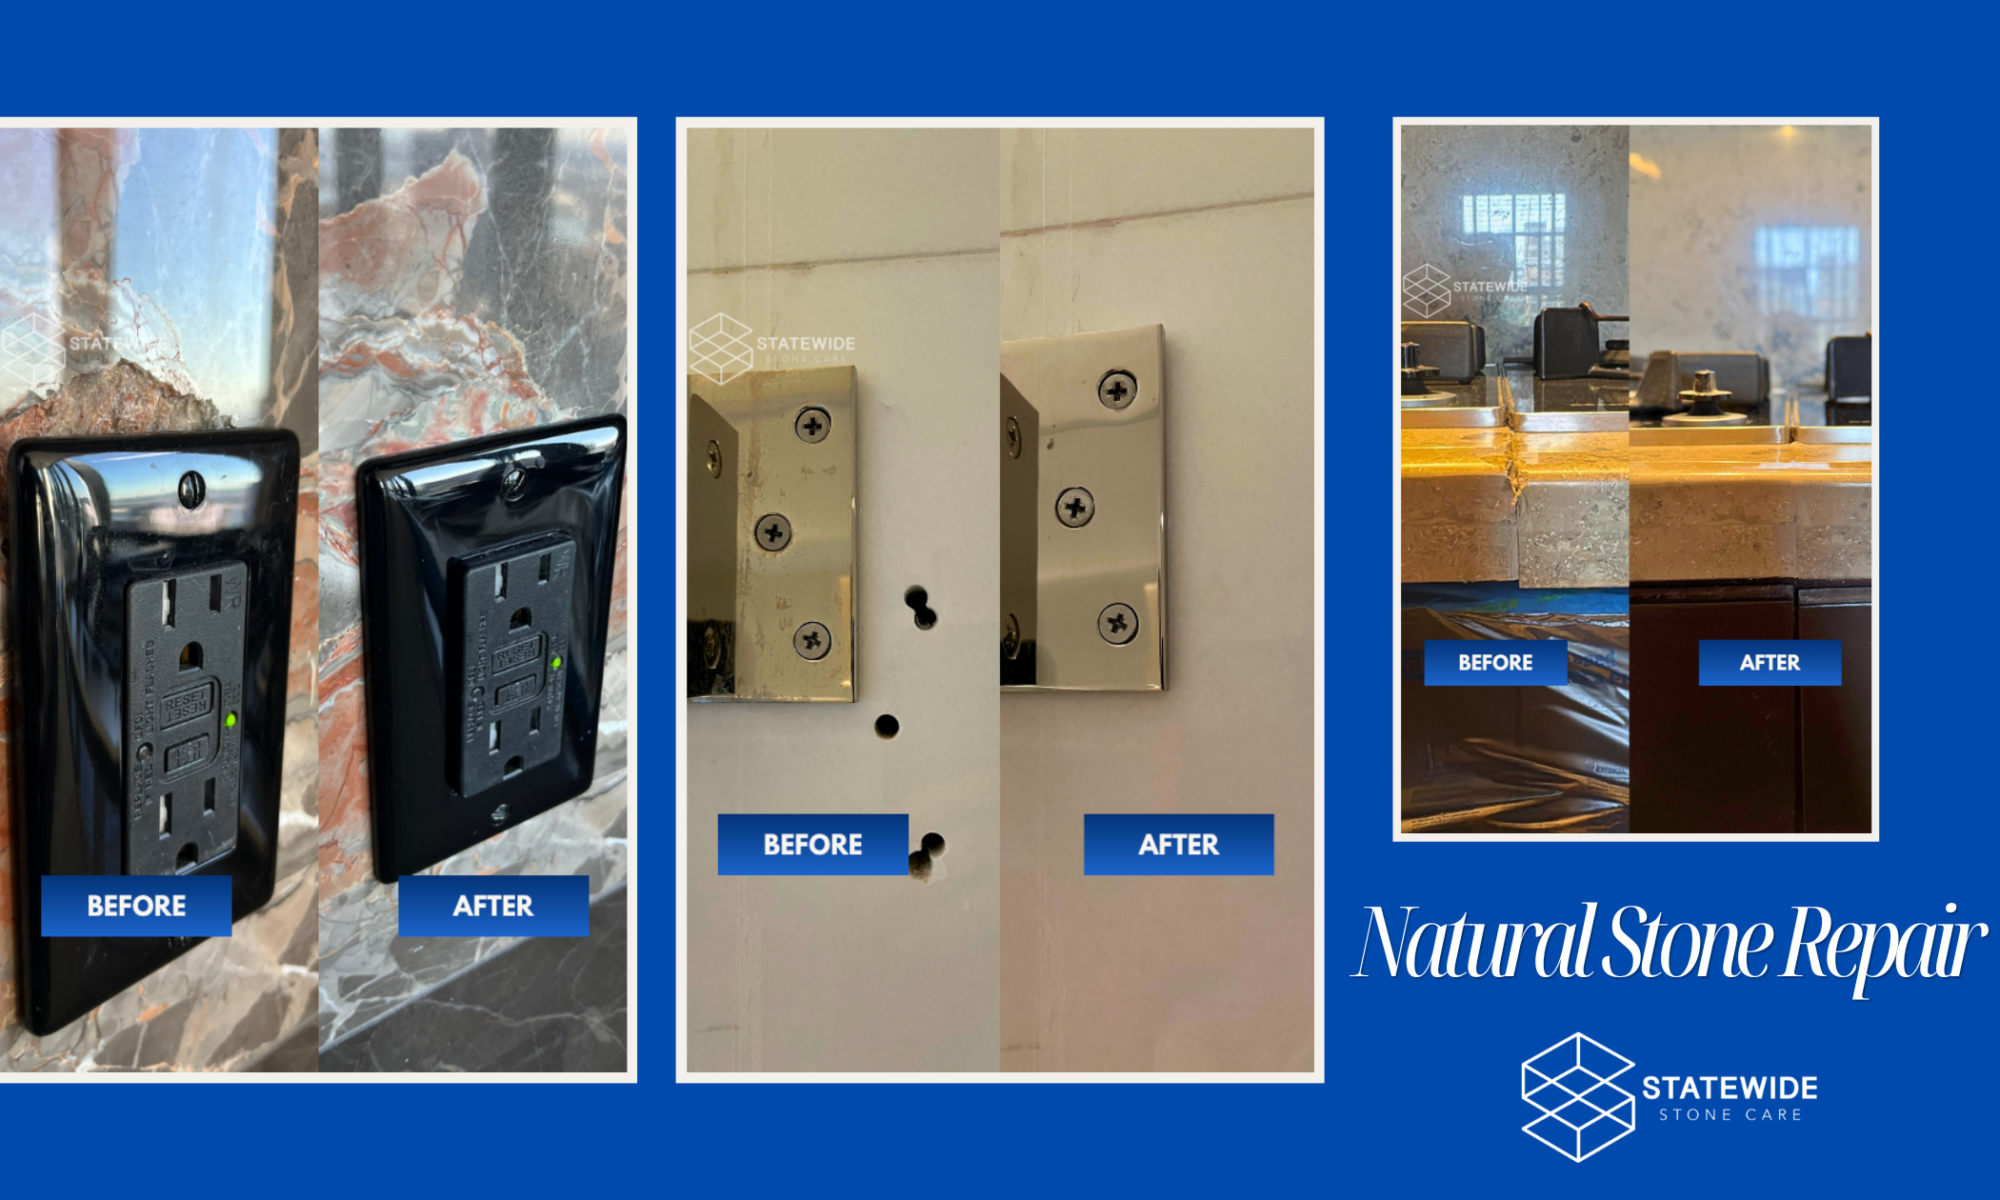
Accidents happen on daily-use surfaces. Discover how Statewide Stone Care masterfully repairs structural damage, cracks, and chips on natural stone installations throughout the Tri-State area.

Natural stone surfaces like marble, granite, and quartzite are durable and beautiful materials chosen for homes and commercial spaces across New York, New Jersey, and Connecticut. From busy kitchen countertops to bathroom vanities and floors, daily use can eventually lead to unexpected chips, deep scratches, or structural cracks.

At Statewide Stone Care, we specialize in durable stone restoration. Using specialized resins, professional color-matching techniques, and diamond honing, we erase physical damage to bring back the uniform, clean appearance of your surfaces.

Before & After: Rebuilding a Broken Countertop

When a natural stone countertop suffers a severe break or is completely shattered, many owners assume that a costly replacement is the only solution. However, our structural reconstruction process can completely rebuild the broken stone, saving the original material and delivering a reliable, smooth finish.
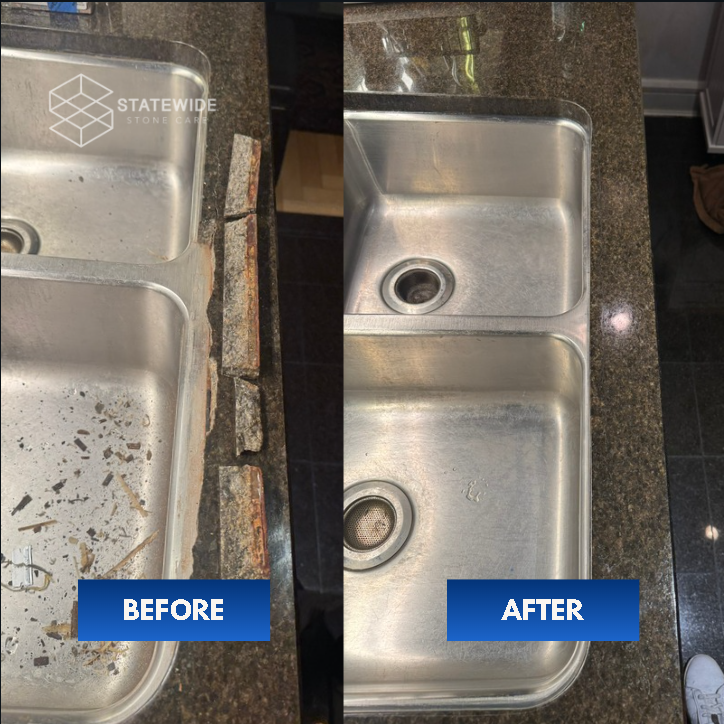
Shattered Countertop Before and After Structural Repair

Before & After: Complete structural rebuilding and polishing of a broken stone countertop.

Repairing Chips and Fractures

Heavy impacts from pots, pans, or dropped household objects frequently cause visible chips along edges. These imperfections disrupt the clean lines of the installation and can trap dirt and moisture over time if left untreated.
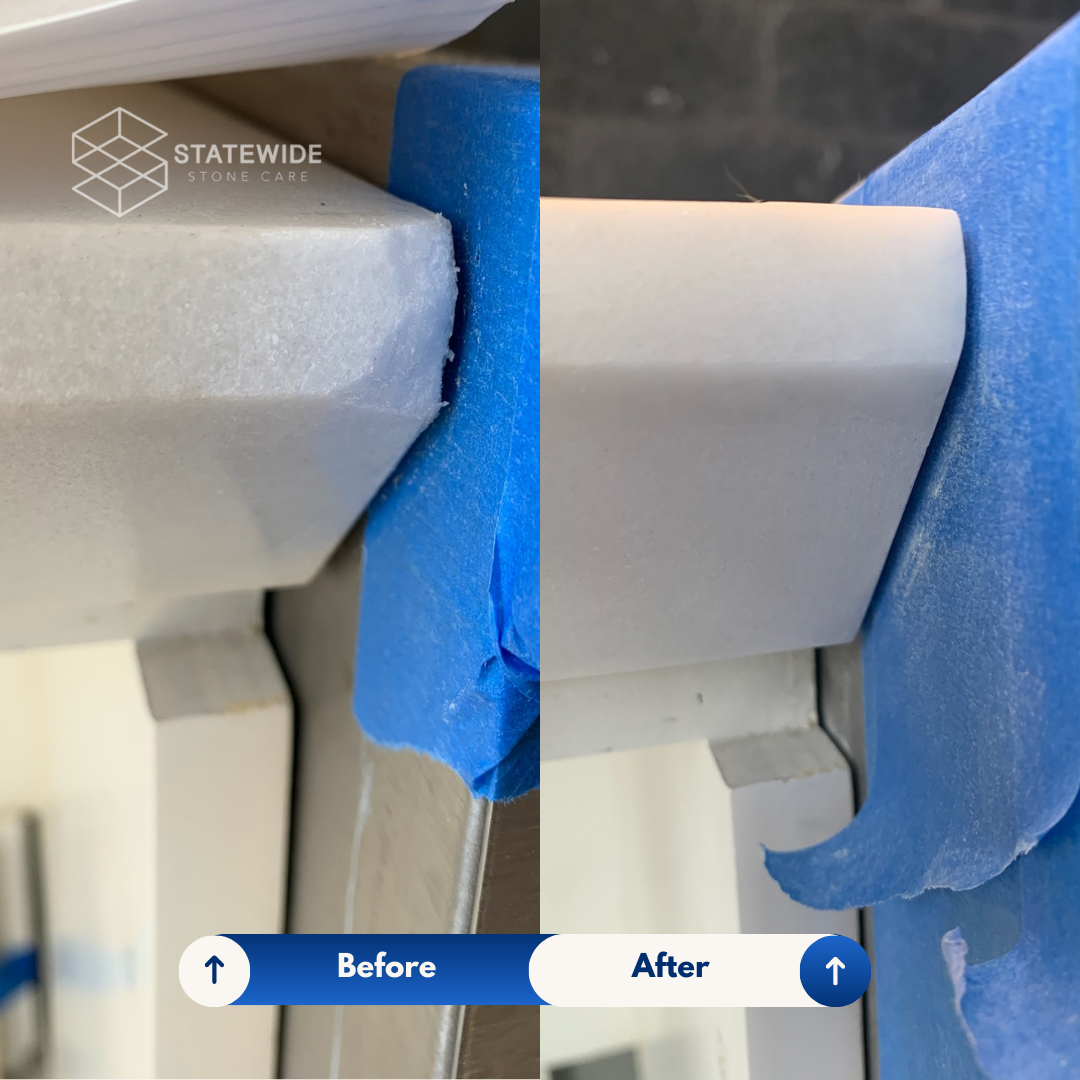
Marble Countertop Chip Repair Before and After

Before & After: Precision edge chip repair, blending with the natural appearance of the marble.

Why Repair Beats Replacement

Replacing a custom stone countertop involves tearing out plumbing, risking cabinet damage, and major disruption. Our on-site restoration processes target only the damaged areas, saving you time and preserving the original investment and look of your stone.

Watch Our Process in Action

Precision execution and proper material knowledge make our repairs fit right in. Watch this brief video showcase demonstrating how our field technicians handle repairs and restore a smooth surface luster:

Blending & Custom Color Matching

No two natural stones are identical. To achieve a clean look, we blend specialized, non-yellowing polymers on-site. We carefully tint the material to match the specific color tones, background shade, and veining pattern of your marble or granite.
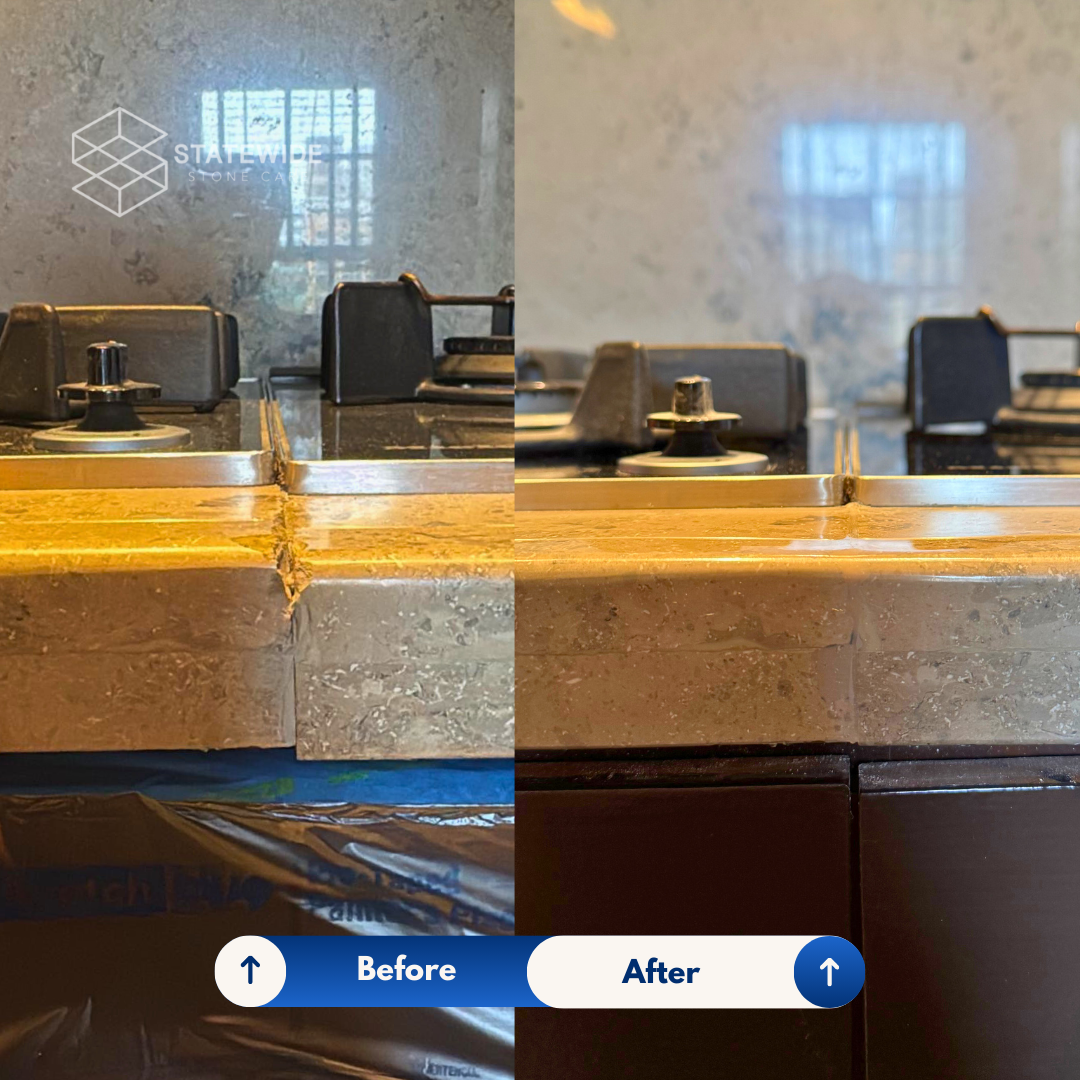
Invisible Joint and Chip Repair on Marble

Before & After: Erasing damage while preserving the natural pattern of the stone.
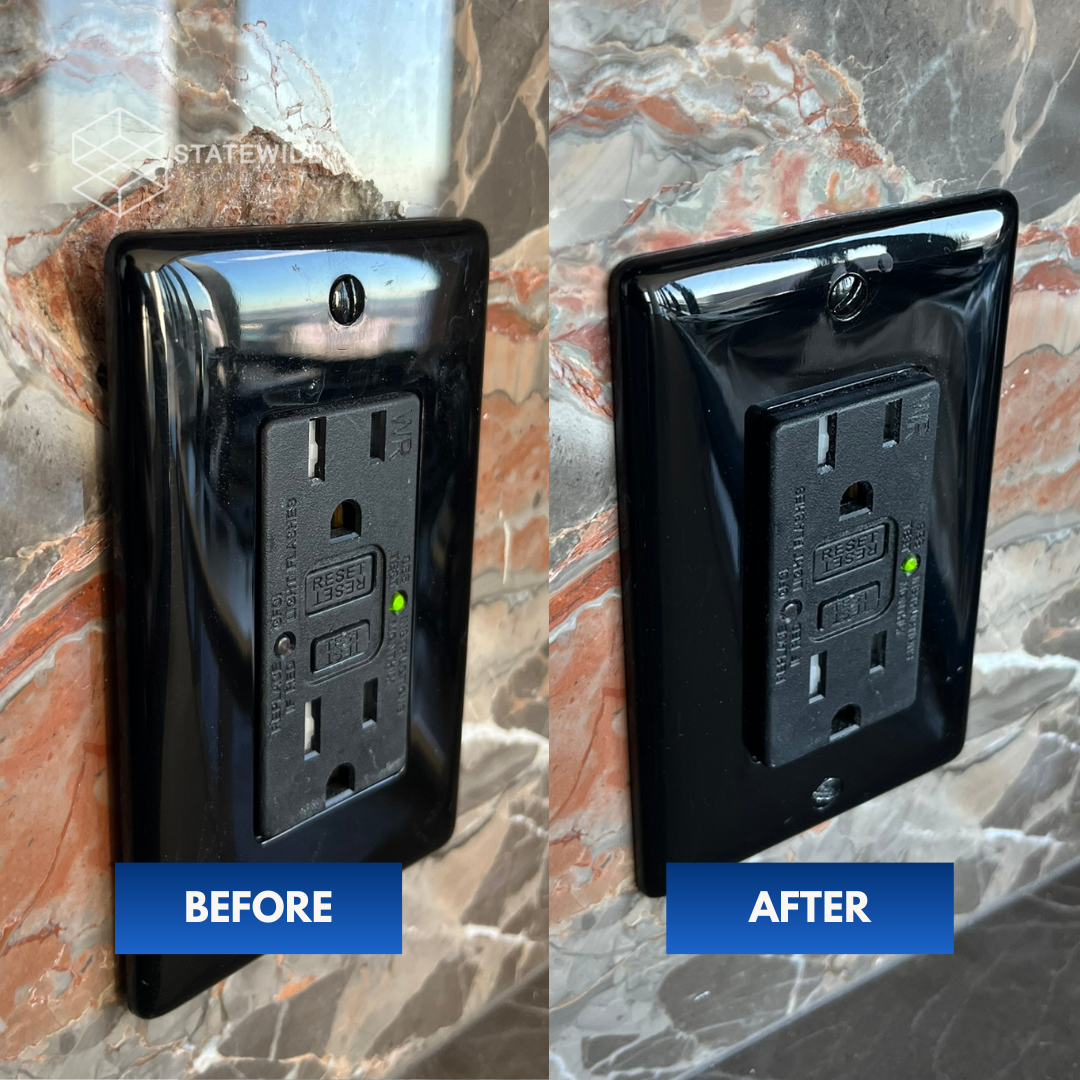
Polished Countertop Edge Repair

Before & After: Edge reconstruction and polishing, returning the finish to its original smooth shine.

Our Comprehensive Stone Repair Protocol

1. Preparation & Cleaning

The damaged area or crack is thoroughly prepared, cleaned, and cleared of loose particles to ensure a strong, long-lasting bond for our architectural resins.

2. On-Site Color Matching

We custom-tint the repair polymers to blend with the natural texture, color shifts, and patterns of your specific stone.

3. Honing & Mechanical Polishing

Once cured, the filled repair is honed flush with the surrounding surface. The final step involves polishing the area using progressive diamond abrasives to match the original sheen level—whether it is a satin honed or a high-gloss finish.

Does your natural stone need professional repair?

Don't allow a physical chip or crack to compromise your stone surface. We proudly serve residential and commercial clients across New York, New Jersey, and Connecticut with practical, expert craftsmanship.

Connect with us on Instagram
How to Remove Etch Marks on Marble Vanities and Countertops in NJ

March 11, 2026 | By Anthony

How to Remove Etch Marks on Marble Vanities and Countertops in NJ

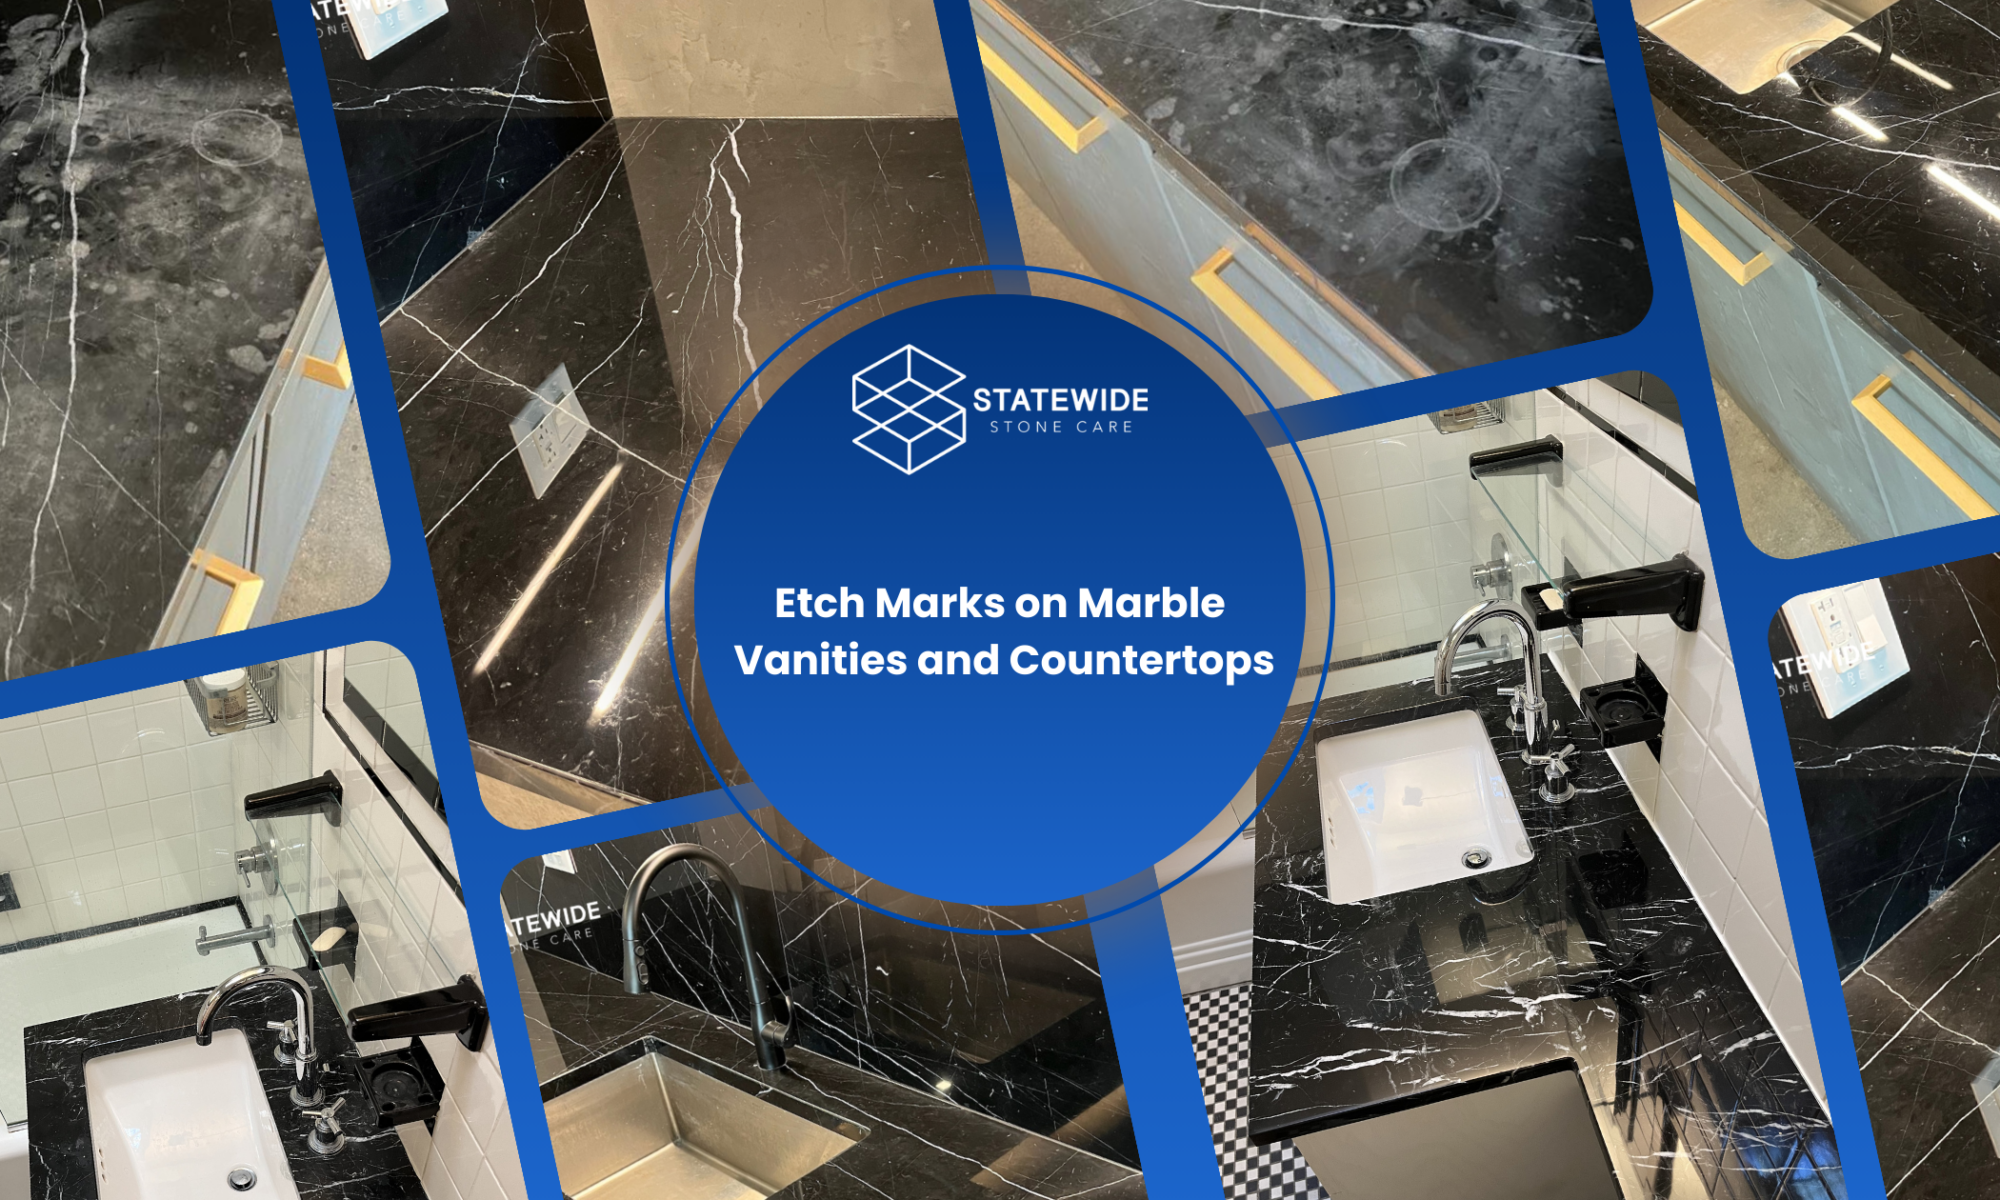
Learn how to remove etch marks from marble countertops in NJ, what causes marble etching, and when to call a professional marble restoration company.

Marble countertops bring timeless beauty to New Jersey homes, but they are also one of the most sensitive natural stone surfaces when it comes to acid damage. If you have noticed dull spots, cloudy rings, or light marks on your marble, there is a good chance you are dealing with etching, not staining.

At Statewide Stone Care, we help homeowners across New Jersey restore marble countertops that have lost their finish due to everyday use, acidic spills, and improper cleaning methods.

What Are Etch Marks on Marble?

Etch marks are areas where the marble surface has been chemically altered by acid. Unlike a stain, which penetrates the stone and changes its color, an etch affects the finish itself. That is why etch marks often look lighter, duller, or feel slightly rough compared to the surrounding polished surface.

Common causes of marble etching include:

  • Lemon juice
  • Vinegar
  • Wine
  • Coffee
  • Tomato sauce
  • Bathroom and kitchen cleaners with acidic ingredients
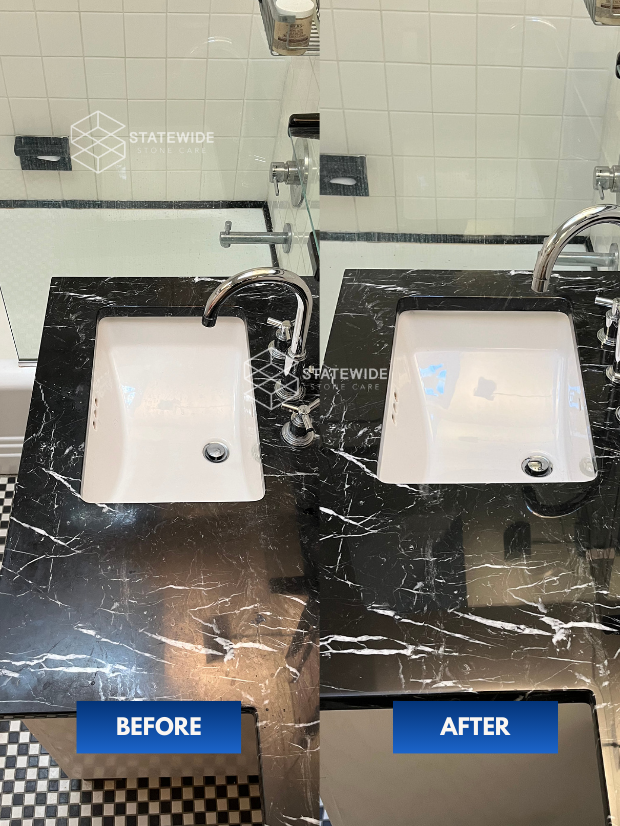
Marble Etch Before and After

Professional Etch Removal Results by Statewide Stone Care

How to Tell If It Is Etching or a Stain

Many homeowners assume every mark on marble is a stain, but etching and staining are different problems.

  • A stain usually darkens or discolors the stone.
  • An etch usually looks dull, cloudy, or lighter than the surrounding finish.

If the spot seems to sit “in” the shine rather than change the stone’s color, it is most likely etching.

What Not to Do

Before trying to fix etched marble, avoid these common mistakes:

  • Do not use vinegar, bleach, or acidic cleaners
  • Do not scrub with abrasive pads
  • Do not use random polish products made for other surfaces
  • Do not spot-polish a large visible area without knowing the finish level

The Professional Way to Remove Etch Marks

Professional marble restoration is the safest and most effective way to remove etch marks while preserving the beauty of the stone. Depending on the severity of the damage, the process may include:

1. Surface Evaluation

The technician identifies whether the issue is etching, staining, wear, or a combination of problems.

2. Honing or Polishing

Light to moderate etching can often be corrected by refining the surface and restoring the finish.

3. Blending the Repaired Area

This is one of the most important steps. Rather than leaving a visible repaired patch, the finish is blended into the surrounding countertop for a uniform result.

4. Protection

Once restored, the surface can be sealed or protected with advanced solutions like MORE® AntiEtch® designed to help reduce future etching and staining.

Remove Stains & Etching from Natural Stone

Want to see real stain and etch removal results? Visit our Instagram to explore before and after projects, restoration footage, and real natural stone surfaces brought back to life.

Want to see real restoration results?

Follow us on Instagram: @statewidestonecare

Follow @statewidestonecare