Stone surfaces—whether granite countertops, marble floors, or wall slabs—add an elegant touch to any space. However, to maintain their timeless beauty, these surfaces require regular upkeep. Both businesses and homeowners can benefit from clean, polished, and well-maintained stone surfaces, creating an inviting environment for the new year.
Why Stone Surfaces Need Maintenance
Stone surfaces are durable but not impervious to wear and tear. Foot traffic, spills, and environmental factors can lead to dullness, stains, and even cracks. Without proper care, the beauty of natural stone can diminish over time, potentially leading to costly replacements. Maintaining these surfaces ensures they remain a statement of style and sophistication while also protecting their structural integrity. Neglect can result in deeper damage that requires more extensive repair work.
For Businesses: A Professional Polish
In a business setting, stone surfaces are part of the first impression customers have. A clean and polished stone floor or countertop conveys professionalism and attention to detail. When clients and customers notice sparkling, pristine surfaces, they associate it with quality and reliability, which can enhance your reputation.
Regular Cleaning
Use pH-neutral stone cleaners to remove dirt, grime, and grease without damaging the surface. Consistent cleaning not only keeps surfaces hygienic but also prevents buildup that could lead to discoloration or stains.
Seal and Protect
Seal stone surfaces periodically to prevent stains and extend their longevity. A well-sealed surface is more resistant to daily wear and tear, maintaining its strength and polished appearance for years.
Repair and Restore
Address cracks, chips, and dull areas promptly. Professional restoration services can bring back the shine and smoothness of your surfaces. This approach also helps extend the life of the stone, reducing long-term maintenance costs.
Routine Inspections
Schedule regular inspections to identify wear patterns and prevent minor issues from becoming major problems. Early detection allows for targeted maintenance, ensuring your surfaces always look their best.
For Homeowners: Revive and Refresh
Stone surfaces at home are a significant investment and a focal point of interior design. To ensure they remain stunning year-round, consider these practices:
Daily Care
Clean spills immediately and use soft cloths or mops to avoid scratching. Avoid harsh chemicals that can erode the sealant or damage the surface. Consistent care ensures that your stone remains vibrant and free from etching or stains caused by daily use.
Polishing for Shine
Polishing stone countertops and floors restores their natural luster, perfect for the holiday season or a fresh start to the new year. Regular polishing also minimizes scratches and imperfections, keeping your surfaces looking luxurious.
Repair Minor Damage
Filling chips and repairing cracks not only keeps your stone looking its best but also prevents further damage. Prompt repairs stop small issues from escalating, saving time and money in the long run.
Reseal for Durability
Just like businesses, homeowners should reseal stone surfaces every 1-3 years, depending on usage, to protect them from stains and etching. A proper seal acts as a barrier, preserving the surface’s natural beauty against water, oil, and other contaminants.
Benefits of Proper Stone Maintenance
Enhanced Appearance: Clean and polished surfaces elevate the look of any room or business space. They make interiors feel more welcoming and sophisticated, adding a touch of luxury to everyday life.
Longevity: Regular maintenance prevents costly replacements and preserves the value of your investment. Stone is a timeless material, and with proper care, it can last for decades, retaining its aesthetic and functional qualities.
Health and Safety: A clean, sealed surface is less likely to harbor bacteria or allergens. Smooth, well-maintained surfaces also reduce the risk of tripping hazards or sharp edges, keeping homes and businesses safer for everyone.
Start the new year by giving your stone surfaces the care they deserve. Whether it’s a countertop, floor, or decorative wall, a little effort goes a long way in keeping them beautiful and functional for years to come.
Why Choose a Professional Stone Care Company
While regular cleaning and minor maintenance can be done at home or by your in-house team, there are times when professional expertise is essential. A professional stone care company has the tools, knowledge, and experience to repair and maintain your stone surfaces, ensuring they look as good as new and last for years.
Expert Assessment
Professionals start by assessing your stone surfaces to determine their condition, identifying cracks, chips, stains, or dull areas. They use specialized equipment to analyze the type of stone and its unique needs, ensuring a tailored approach to maintenance and repair.
Specialized Repairs
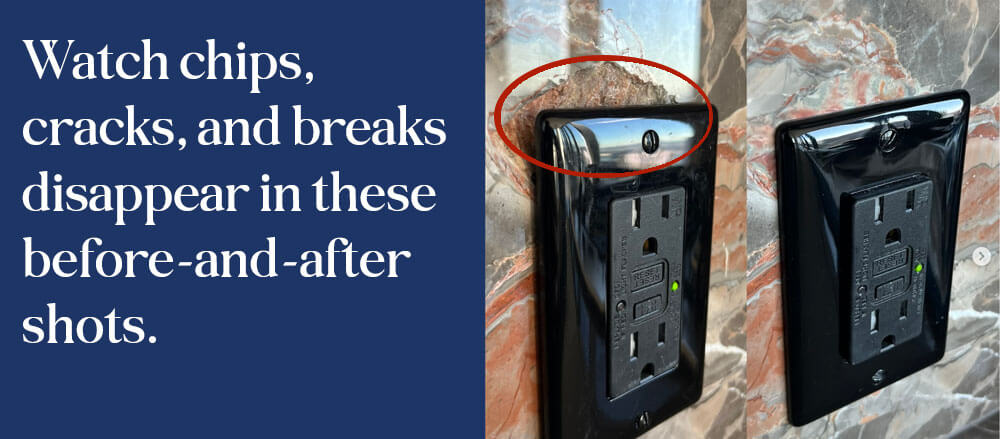
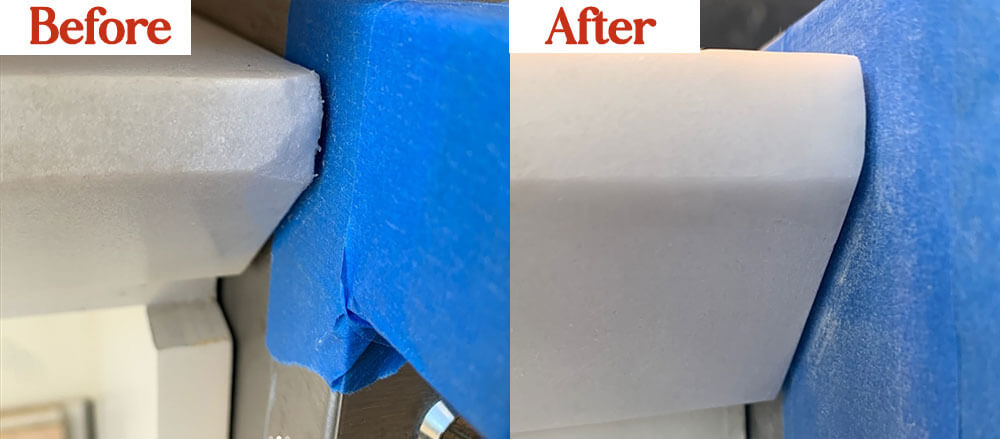
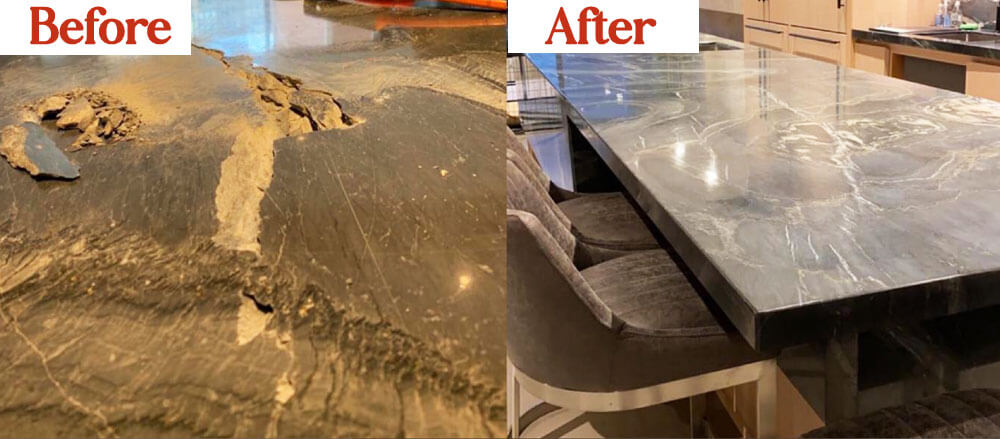
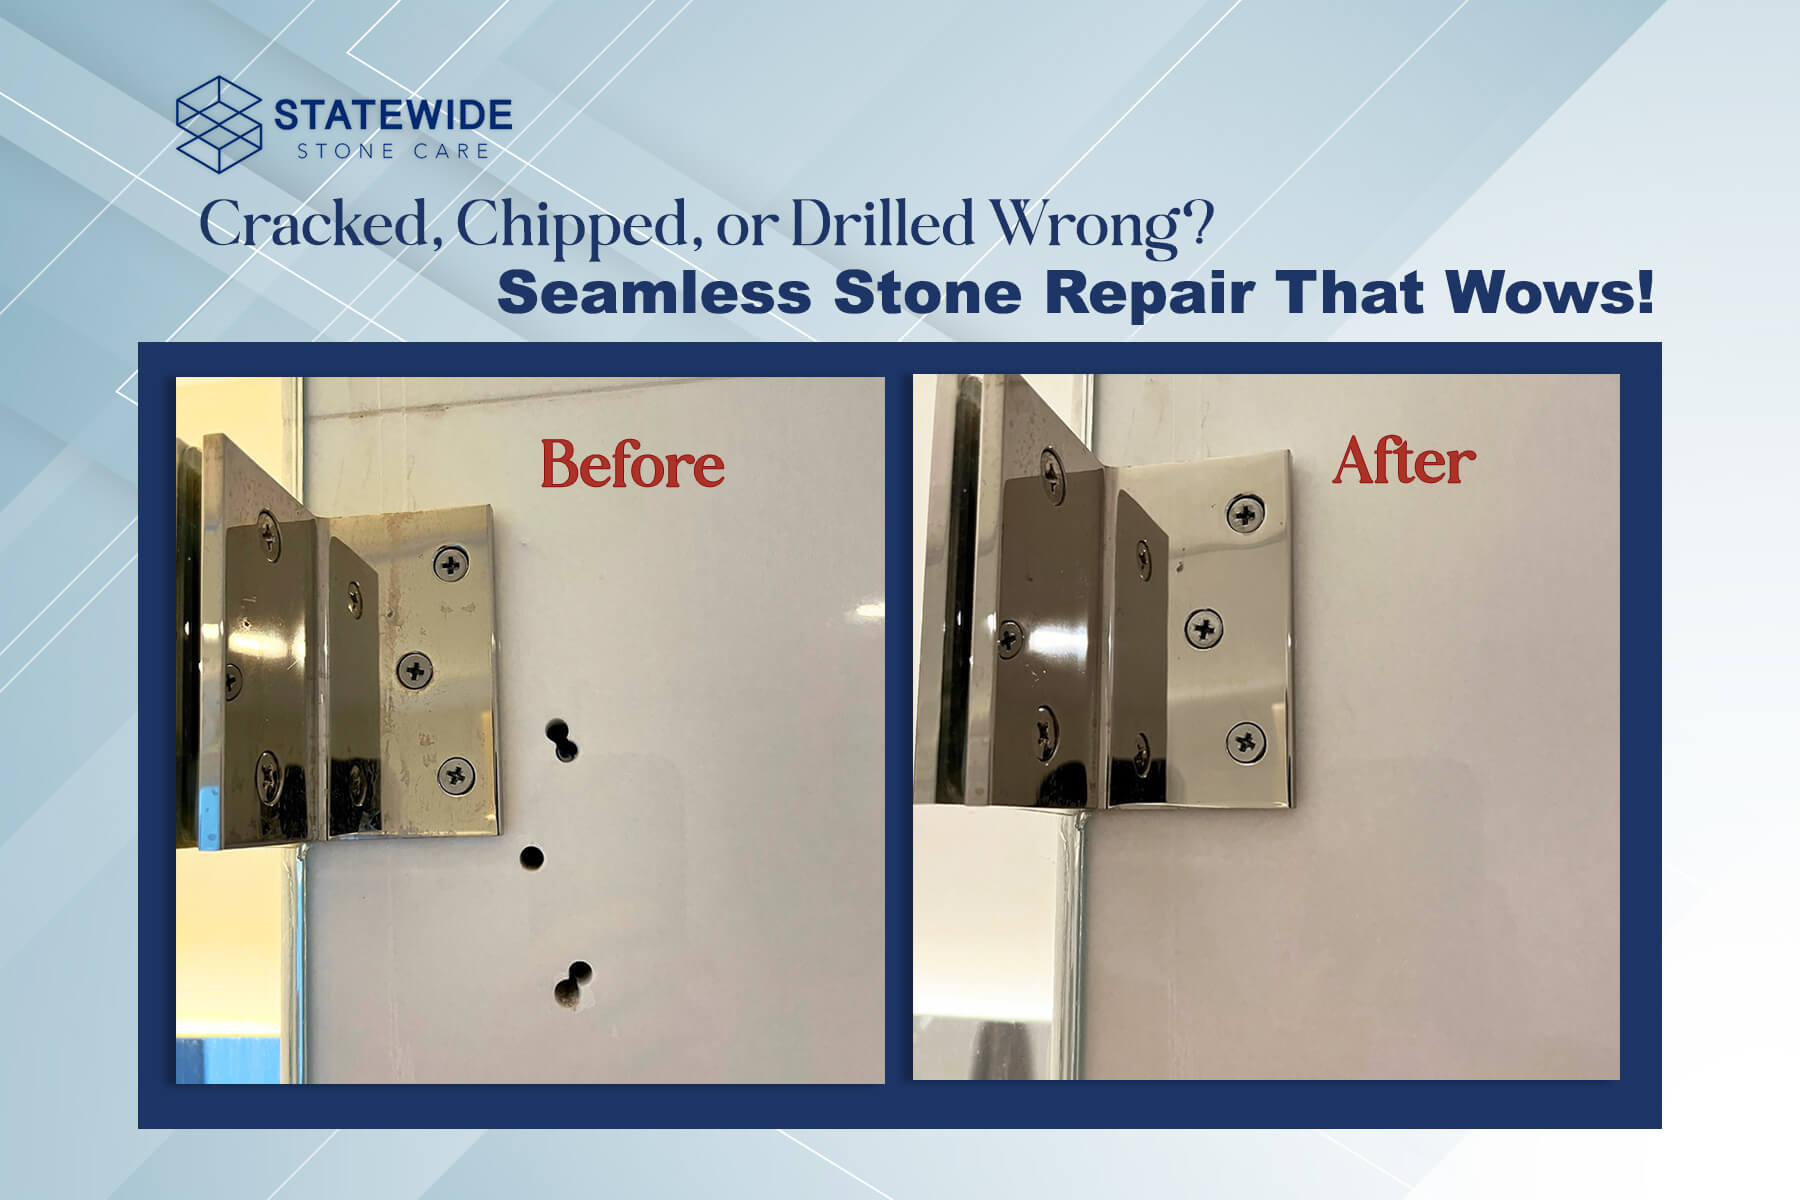
Cracks, chips, and etching can be challenging to fix without the right tools. Professional stone care companies can expertly fill cracks, polish out imperfections, and even color-match repairs to blend seamlessly with the rest of the surface. This precision ensures that the repairs are virtually invisible, restoring the surface to its original beauty.
Deep Cleaning
Over time, dirt, grime, and spills can penetrate the surface of natural stone, leading to discoloration. Professionals use industrial-grade cleaning solutions and equipment to deep clean your surfaces, removing stubborn stains while preserving the stone’s integrity.
Polishing and Honing
For dull or scratched stone surfaces, professionals can hone or polish the stone to restore its natural luster. Whether you prefer a high-gloss finish or a matte look, they can customize the polishing process to match your aesthetic preferences.
Sealing and Protection
After cleaning and repairs, sealing is a critical step to protect your stone from future damage. Professional-grade sealants provide long-lasting protection against stains, moisture, and wear. Experts can also recommend the best type of sealant for your specific stone and its environment.
Restoration Services
For older or heavily damaged surfaces, restoration might be necessary. This process can include grinding, resurfacing, or complete refinishing to rejuvenate even the most neglected stone surfaces.
The Benefits of Hiring Professionals
Time Savings: Professionals complete the work efficiently, allowing you to focus on other priorities.
Long-Lasting Results: Expert repairs and maintenance extend the lifespan of your stone surfaces, reducing the need for frequent touch-ups.
Enhanced Appearance: With their specialized skills, professionals can achieve a flawless finish that’s difficult to replicate with DIY methods.
Peace of Mind: Knowing your investment is in expert hands ensures that your stone surfaces will remain durable and beautiful.
Whether you’re a business owner looking to impress clients or a homeowner striving for a pristine home, a professional stone care company like NYC Statewide Stone Care can elevate the beauty and functionality of your stone surfaces. Investing in professional maintenance today can save you from costly repairs or replacements in the future.
