Make Your Natural Stone Backsplash Stand the Test of Time

making natural stone backsplash last in NYC, NY

Natural stone backsplashes are often overlooked when it comes to regular cleaning and maintenance, unlike countertops that receive more attention. It’s easy to underestimate the dirt and grime that can accumulate on a backsplash over time, as it may not be as visibly apparent. However, neglecting this can gradually diminish its beauty and increase the likelihood of stain penetration.

Understanding the Cleaning Care Challenges in NYC

Natural stone backsplashes in kitchens and near sinks face several challenges. They are exposed to water, heat, oils, acidic substances, and daily wear and tear. Over time, if not properly maintained, they can become susceptible to staining, etching, and general deterioration. By understanding the importance of proper care and maintenance for your natural stone backsplash, you can maintain its timeless beauty and durability. Let’s explore the necessary steps to keep your backsplash looking its best and the advantages of seeking professional assistance for comprehensive care.

Proper Care and Cleaning

Regular Cleaning: Wipe down the backsplash daily with a soft, damp cloth or sponge to remove dust, dirt, and spills. Avoid abrasive cleaners or scrub brushes that can scratch the stone’s surface.

Mild Soap Solution: For routine cleaning, mix a few drops of pH-neutral dish soap or stone-specific cleaner with warm water. Gently scrub the backsplash using a soft cloth or sponge, then rinse with clean water. Avoid acidic or abrasive cleaners, as they can damage the stone.

Stain Removal: In case of stubborn stains, create a poultice by mixing a powdered stain remover or baking soda with water until a paste-like consistency is achieved. Apply the poultice to the stain, cover it with plastic wrap, and allow it to sit for 24 to 48 hours. Remove the poultice and rinse the area thoroughly with water. Repeat the process if necessary.

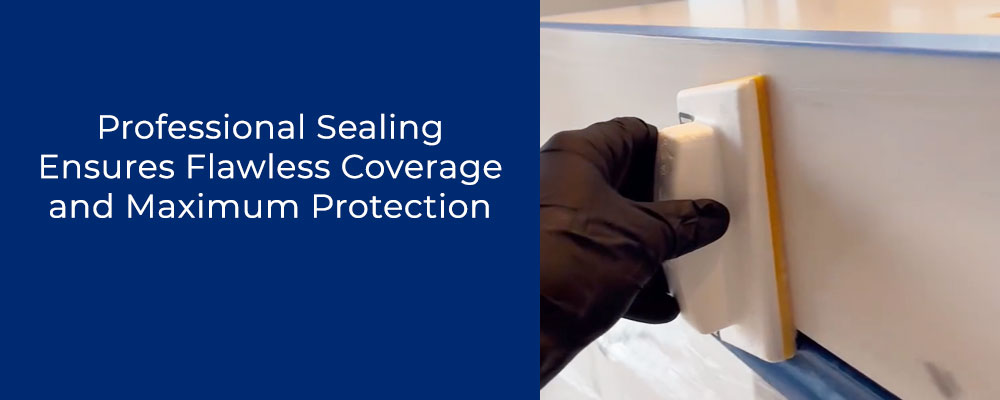
Sealing: Natural stone backsplashes should be sealed to protect against stains and moisture. Follow the manufacturer’s recommendations for the specific stone type and apply a penetrating sealer every 1 to 3 years. Ensure the backsplash is clean and dry before applying the sealer.

Stone Professional Cleaning and Maintenance NYC

While regular care is essential, professional NYC stone cleaning and maintenance care services from Statewide Stone Care can offer additional benefits that go beyond what regular upkeep can achieve. Professionals with extensive experience and knowledge in handling natural stone backsplashes have a deep understanding of the unique properties and vulnerabilities of different types of stone. They possess the expertise to identify and address potential issues that may arise during the maintenance process. Their meticulous approach ensures that every aspect of your natural stone backsplash is properly cared for, from selecting the appropriate stone care products and techniques to conducting thorough inspections for any signs of damage or deterioration. Entrusting the task to skilled professionals provides peace of mind, knowing that your valuable investment is in capable hands and will receive the specialized care it requires for long-term preservation. Here’s why their services are worth considering:

Expertise and Knowledge: When it comes to caring for natural stone backsplashes, the expertise and knowledge of professionals are invaluable. They possess a deep understanding of different stone types, safe chemicals, their unique characteristics, and the most effective cleaning techniques. Their experience ensures that your backsplash receives the appropriate care it deserves.

Specialized Equipment: Professionals are equipped with specialized tools and equipment specifically designed for cleaning and maintaining natural stone. These tools allow them to efficiently and effectively address various challenges, such as deep-seated stains, grime buildup, and restoration needs. Their professional-grade equipment ensures optimal results without compromising the integrity of the stone.

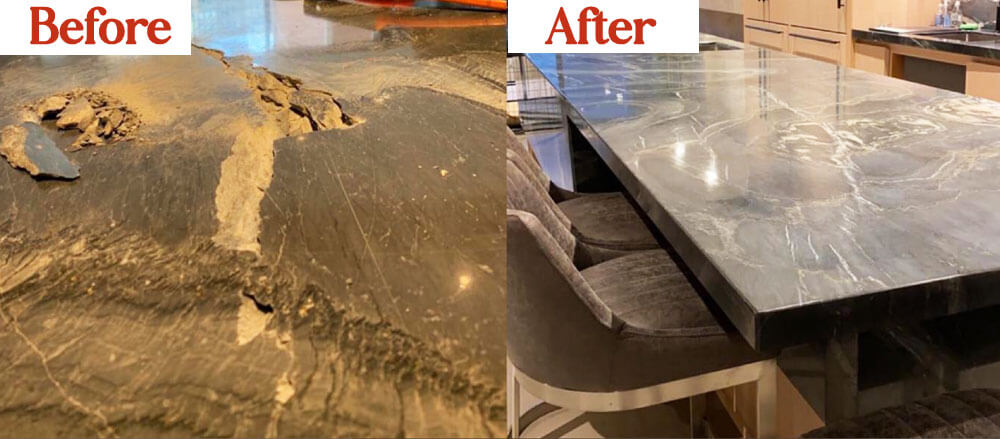
Restoration and Repair Experience: In addition to cleaning, professionals can provide restoration and repair services for your natural stone backsplash. They have the skills to tackle cracks, chips, and grout issues, restoring the backsplash to its original beauty. Their experience in restoration ensures that any repairs are carried out with precision and care, preserving the overall aesthetics of the backsplash.

Tailored Guidance and Recommendations: Professionals can offer tailored guidance and recommendations based on the specific characteristics of your natural stone backsplash. They can advise you on the most suitable sealers, provide long-term maintenance tips, and offer valuable insights into caring for your particular stone type. Relying on their expertise ensures that your backsplash receives the appropriate care and attention it needs to maintain its longevity.

Caring for natural stone backsplashes in kitchens and near sinks requires regular maintenance and attention. By following proper maintenance routines, you can preserve the beauty and longevity of your backsplash. Additionally, consider professional cleaning and maintenance as a valuable option to address more challenging issues and enhance the overall appearance of your natural stone backsplash. With the right care, your natural stone backsplash will continue to be a captivating focal point in your kitchen or bathroom for years to come.

Stone Countertop Care for Cooking Enthusiasts

NYC marble stone-countertop-care-for-cooking-enthusiasts

For cooking and baking enthusiasts, the kitchen is more than just a functional space—it’s where their creativity flourishes, and culinary masterpieces come to life. When it comes to creating the perfect cooking environment, natural stone countertops shine as a top choice. They bring beauty and elegance to your kitchen and offer numerous benefits that can elevate your cooking and baking experience. In this guide, we will focus on two essential aspects: heat and impact resistance. These surfaces provide a durable and reliable workspace that can withstand the demands of your busy kitchen. Beyond their practical advantages, they also enhance the style and aesthetic of your kitchen, adding a touch of sophistication. Prepare to explore the many benefits of these countertops in creating a stunning kitchen space!

Heat Resistance: Keeping Cool in the Kitchen

When it comes to heat resistance, natural stone countertops shine as the heroes of the kitchen! Boasting exceptional heat resistance, they are the perfect companion for all your culinary adventures. From sizzling pans to piping-hot dishes, they can handle the heat with ease. Certain types of natural stone, such as granite and quartz, are particularly renowned for their ability to withstand high temperatures without any damage or discoloration. Even though these surfaces can handle direct contact with high temperatures, like steaming pots or hot baking sheets, it is always recommended to use trivets or hot pads as a precautionary measure. These protective accessories will help safeguard your countertop from potential damage, discoloration, or thermal shock, ensuring its long-term durability and maintaining its pristine appearance.

Impact Resistance: Standing Strong Against Everyday Use

Cooking and baking demand a worktop that is both durable and reliable. That’s where natural stone truly shines! Designed to withstand the impacts and demands of a busy kitchen, these slabs won’t show signs of wear or damage. In particular, granite and quartz excel in their ability to resist impacts, making them excellent choices for those seeking long-lasting solutions. Renowned for their strength and durability,  they can handle the force of everyday cooking without worrying about scratches, cuts, or damage. With natural stone, you can confidently pursue your passion for cooking and baking, knowing that your surface will stand strong and support you throughout your kitchen endeavors.

Stylish Kitchen: Aesthetics and Beyond

In addition to their functional benefits, they offer a touch of style and sophistication to any kitchen. With a wide variety of patterns, colors, and textures available, they offer endless possibilities for customization. Whether you prefer the classic elegance of marble, the bold and dramatic veining of granite, or the sleek and modern look of quartz, there is an option to suit every taste and kitchen style. By incorporating stone into your kitchen, you can create a focal point that enhances the overall ambiance and adds a touch of luxury. So, let your creativity flourish and explore the endless possibilities of incorporating stone slabs into your dream kitchen.

Practical Tips: Maintenance and Care

While natural stone countertops offer impressive heat and impact resistance, proper care and maintenance are essential to preserve their beauty and performance. Here are some helpful tips to ensure they remain in top condition:

  1. General Maintenance. Wiping down your countertops regularly with a soft cloth or sponge, warm water, and a mild, pH-neutral cleaner specifically formulated for natural stone is key. This helps prevent the buildup of dirt and stains, keeping them looking their best.
  2. Cleaning Products. The use of appropriate cleaning products is important. Avoid using harsh chemicals or abrasive materials that can potentially damage your countertops. Opt for gentle, non-abrasive cleaners that are specifically designed for these surfaces.
  3. Sealing. Professionally sealing your countertops is an important step in their maintenance. Sealing enhances stain resistance and helps prolong their lifespan. It’s recommended to consult with a natural stone cleaning professional to determine the appropriate sealing frequency for your specific type of slab.
  4. Cutting Boards. When it comes to handling sharp objects, it’s always wise to use cutting boards or mats as a protective barrier. This prevents potential scratches or damage to the surface of your countertops and helps maintain their pristine condition.
  5. Professional Care. Consider Statewide Stone Care professional cleaning services as an option for optimal care. These experts specialize in natural stone care and can provide deep cleaning, resealing, and restoration services as needed. They have the knowledge, expertise, equipment and products to handle your countertops with care, ensuring they receive the best possible treatment.

By following these practical tips for maintenance and care, you can ensure that they remain in top-notch condition, and continue to be a reliable and long-lasting companion in your culinary pursuits.

Final Thoughts on Natural Stone Countertops

By considering these key points, natural stone countertops are not only beautiful additions to your kitchen but also offer impressive heat and impact resistance. They can handle the demands of your busy kitchen while maintaining their durability and enhancing the aesthetic appeal of your cooking space.

Stone countertops for your stylish kitchen is a decision that brings numerous benefits. Not only do they offer practical advantages, but they also elevate the overall ambiance and look of your culinary space. With a wide range of patterns, colors, and textures available, you have the opportunity to personalize your surfaces to perfectly match your style and design preferences.

So, let your imagination run wild and envision your dream kitchen adorned with the timeless beauty of natural stone countertops. Enjoy the durability, heat resistance, and impact resistance they offer, and make a choice that will truly enhance the heart of your home.

Are Marble Floors Difficult to Maintain?

As a flooring option, marble floors offer a beautiful and timeless addition to any space, whether it’s a home, office, building lobby, etc. Marble is a natural stone with veined patterns and colored marble variations that can give the space an elegant look for many years to come. But while marble is relatively easy to maintain day-to-day, it is also a porous material, which means that maintaining its beauty in the long term requires some occasional extra care. Let’s discuss marble maintenance in general, and what is required in order to keep your marble surface looking great for years down the road.

Tips for Maintaining Your Marble Floors

The key to keeping marble stone floors looking their best is to think of your marble maintenance strategy in terms of short-term, mid-term, and long-term maintenance. The following tips will cover each of these.

Clean on a Weekly or Daily Basis

For short-term maintenance, marble floors should be cleaned on a regular basis. For daily cleaning, you can simply use a soft, dry push mop to remove dirt and dust from the floor. This sounds simple enough, but it’s also very important because if dirt is left on the floor, it can be ground into the floor by people walking on it, causing microscopic scratches and dulling the finish. For weekly care (or at least every few days), use a soft mop and warm water to clean the floors. If you use any type of cleaner when mopping, make sure it’s a cleaning solution specifically designed for marble surfaces. Do NOT use ammonia, vinegar, or anything acidic or corrosive, as these can interact chemically with the stone and cause permanent damage. Establishing a regular cleaning regimen like this can keep your marble floors looking their best and also prevent dust and dirt from accumulating in the pores of the marble (or in the grout connecting marble tile floors).

Perform Routine Maintenance on the Stone

For mid-term marble maintenance, you should go beyond the basic cleaning and give your marble floors a thorough cleaning and inspection. This is to remove any dirt or residue that may have become embedded in the marble over time, as well as to look for signs of scratching, chipping, or cracking and make needed repairs before these become bigger problems. For this step, consider hiring a stone care professional to come in every few months and perform routine maintenance. For highly polished marble floors, you may want to schedule maintenance more frequently than for honed marble or matte finishes as polished finishes can show signs of wear more easily. (Statewide Stone Care can offer a variety of regular maintenance packages.)

Seal Stone Regularly

For long-term maintenance, marble floors should be treated periodically with a sealer to protect the marble from staining and etching. Sealing marble creates a protective barrier on the surface that keeps liquids and other substances from seeping into the stone, thus preventing discolorations and damage. For best results, have a professional do the sealing for you. For most marble floors, re-sealing can be done once every few years, but more frequent sealing may be required for outdoor surface or high-traffic areas. Your stone care professional can advise you on how often your floors should be re-sealed.

Work with a Marble Stone Care Professional

As you can see, marble maintenance is not a difficult task if given the right amount of attention. However, long-term marble care can also be tricky, so it’s best to work with an experienced marble stone care professional who knows how to properly maintain marble surfaces and can assess any damage that may have occurred over time. That way, you can rest assured that your marble floors will look beautiful for many years to come.

At Statewide Stone Care, our technicians are highly trained in all aspects of care and maintenance for stone and tile flooring, including all types of marble. We can work with you to establish a regular maintenance regimen that is just right for your needs. For a free estimate, contact us today.

Can You Repair a Limestone Floor?

limestone-floor-care-restoration-repair-nyc

Limestone is a popular choice for flooring due to its beauty and durability. However, limestone floors are not indestructible. Between consistent foot traffic, temperature changes, scratches, spills, staining, or even accidentally dropping heavy items, limestone floors can become chipped and damaged over time. If your limestone floor has been compromised, you may be wondering if it’s possible to repair it or if you’ll simply have to replace it.

The good news is that depending on the extent of the damage, it’s highly possible to repair your existing limestone floors rather than Let’s discuss all the essential information you need to bring your floor back up to its full potential.

How to Repair a Limestone Floor

For best results, the following process should only be completed by a trained stone care professional. However, these are the steps our technicians at NYC Statewide Stone Care typically follow when doing a limestone floor repair.

Vacuum or Sweep Up Cracked Debris

First, vacuum or sweep up any cracked debris on the floor, not only to prevent injury but also to prevent additional damage. Use a gentle motion and proper cleaning tools to avoid disturbing the other unaffected parts of the limestone floor. If your stone is polished and prone to scratching, be extra-cautious and use a soft-bristled broom or an upholstery attachment. Don’t use a vacuum with a beater brush as this may cause additional scratching as the debris moves on the floor.

Remove the Old Grout

Removing the old grout from limestone floor tiles can be a messy and time-consuming job, but it is an important step in the repair and restoration process of any limestone floor. First, use a small chisel to chip away any bits of grout that remain in the joints surrounding the tiles. Once you have removed all of the easier accessible pieces of grout by hand, cover up other areas with cloth or paper in order to protect them. Then, saturate the joints intently with liquid tile cleaner for about 10 minutes before continuing to drill out any remaining pieces of grout with carbide masonry drill bits. Be sure to keep your slow-speed drill steady and regulated at all times so as to not damage any tiles during this process. Another key part of this procedure is having good ventilation because drilling releases dust into the air. After you are finished, thoroughly clean and rinse off the stone floor using soft-bristle brushes and a pH-neutral cleaner.

Re-Grout the Floor

Once the floor is clean and dry it’s time to apply new grout. Start by vacuuming the grout lines to remove any remaining dust or debris. You may also want to apply masking tape to painted walls to protect them from stray grout; you can also apply masking tape around the joints to keep grout off the limestone floor tiles, but if the tiles have been recently sealed, you may just be able to clean the excess tile as you go. Next, apply new grout with a putty knife, directly into grooves between tiles. Wipe away any excess grout and allow the area to dry for an appropriate amount of time.

Repair Chips and Cracks with Epoxy

The next step in the process is to repair any chips and cracks that appear in the limestone. This is accomplished by utilizing a special epoxy that is expertly color-matched to your floor so when the repairs are complete, you won’t be able to tell the epoxy apart from the floor itself. (Again, trust the pros to complete this process.)

Polish the Floor

Next, you’ll want to apply a pro-level polish to the entire limestone floor. This not only removes excess traces of grout, but it also hones the epoxied repairs so that the finish matches the rest of the floor. Make sure you have a polishing powder and sealant that are specifically formulated for limestone. Our experts use a variety of light abrasives to create an even finish across the entire floor.

Seal the Floor

Finally, to protect the limestone floor from future staining and water damage, you’ll want to apply a sealant that is specificified for limestone floors. The sealant should be distributed evenly across the entire floor to avoid the “hazed” look of excessive sealant.

Consult with a Stone Care Professional

Limestone can be a tricky material to work with, so to make sure the job is done right, it’s always best to consult with a stone care professional whenever repairs are needed to ensure that your limestone floor is properly restored and will last you for years to come. At Statewide Stone Care, we have many years of experience in the Tri-State area repairing limestone floors, as well as other natural stone and tile floors, to the point that you won’t even be able to see the damage. If you’ve got damage limestone floors contact us today for a free evaluation and estimate for repairs.

How Often Should You Seal Your Countertops?

how-often-seal-countertops-blog

Having natural stone countertops in your kitchen or bath can be a beautiful way to add value and luxury to your home. But stone surfaces are also porous, which means that moisture can seep into the stone, eventually causing staining and discoloration over time from everyday use. If that happens, the problem typically has to be fixed by refinishing the surface. Applying a sealant periodically can prevent this issue and extend the life of your stone. Stone sealers add a barrier of protection so moisture can’t seep into the stone underneath, thereby preventing staining. The question is: how often should you seal your countertops?

The answer is different for everyone because a number of factors are involved. Granite and marble sealing, for example, should happen at a different rate than limestone or travertine. Let’s take a closer look at these factors so that you can determine when it’s time to reseal your granite, marble, or other stone and tile counters for optimal protection.

Factors to Consider When Sealing Your Countertops

Let’s start by looking at the individual factors that can increase or decrease the rate of wear-and-tear on various natural stone surfaces.

Type of stone. The type of stone you have affects the frequency with which you need to seal it. Harder stones like granite and slate are denser and less porous than softer stones such as limestone and marble. Therefore, granite surfaces generally require sealing less often than their softer counterparts.

Color/shade of the stone. As a rule of thumb, lighter-colored stone surfaces tend to be more porous and require resealing more often–even among countertops of the same type of stone. Plan on resealing a lighter-colored granite countertop more frequently than a dark granite slab, for example.

Amount of use. How often you use your countertops can also affect how quickly sealant wears off. High-use areas such as kitchen counters, bathroom vanities, and bar tops may require more frequent sealing than surfaces used only occasionally.

Type of sealant. Some sealants are designed to last longer than others; however, they can be more expensive. If you’re using a lower-grade sealant, you may need to reapply it more often.

Frequency of cleaning. If you tend to leave spills and water droplets standing on the countertop, this can wear down the sealant more quickly. You can make the sealer last longer by cleaning spills as they happen and by cleaning your granite, marble or travertine countertops regularly with gentle dish soap and water, then drying the excess water quickly so it doesn’t stand on the surface.

Environment. Outdoor kitchens with stone countertops must be resealed more often than countertops indoors, for example, due to the wear-and-tear of the elements, the freeze-thaw cycles of wintertime, etc.

How to Tell When It’s Time to Reseal Your Stone Countertops (The Water Test)

Many home and business owners assume “more is better” when it comes to resealing, but that’s not always the case. Over-sealing with multiple layers can actually leave your stone surfaces with an unattractive “hazed” look that is difficult to remove.

The best way to tell when your countertops need to be resealed is the “water test.” Here’s how it works: simply pour a tablespoon of water onto your stone countertop and wait about 30 minutes. If the water beads up on the surface, you’re good–the sealant is still there and doing its job. If, however, the water is absorbed into the stone and darkens it, then you know it’s time to seal your stone.

How Often Each Type of Stone Countertop Should be Sealed

Remember, there’s no hard and fast rule for how often you should re-seal your stone countertops. All different factors need to be considered, including how much use the countertops get, whether the countertops are indoors or outdoors, etc. That said, the following are some general recommended ranges for how often to have a sealant reapplied. Plan on more frequent resealing for high-use or outdoor surfaces, and less frequent for low-use, indoor surfaces, and so on.

Marble

Marble is one of the most popular stone surfaces, but it’s also higher maintenance due to its porosity and light color. For regular use, plan to schedule marble resealing every 3-6 months.

Granite

Granite is one of the densest and least porous of the natural stones used for countertops. You can plan to seal your granite countertops about once every 1-2 years.

Slate

Like granite, slate is a dense and fairly non-porous stone. For best results plan on resealing every 1-2 years depending on usage.

Limestone

Limestone tends to be light, soft, and very porous, similar to marble. Plan on resealing at least once a year, or every six months with heavy use.

Travertine

Travertine countertops tend to be dense, durable, and low-maintenance. Resealing every 1-2 years usually works for these countertops.

Are Your Countertops Ready to Be Sealed?

Many stone sealing products are available for do-it-yourselfers, but for the best finish and an even, long-lasting seal, it’s best to have the sealant applied by a trained stone care professional. At Statewide Stone Care, our technicians are highly trained in sealing all types of natural stone, including granite and marble sealing, slate, limestone, and others. We can also do a free evaluation of your stone countertops to give more specific advice on how often you should schedule re-sealing based on the type of stone and the amount of use. For a free estimate, contact us today.

Can Anti-Etch Prevent Etching and Staining of Your Countertops?

Why do we love marble, travertine, or other types of natural stone countertops in our homes and businesses? The simple answer is that we love the beauty and elegance these surfaces add to the space, plus their durability over time. But at the same time, these stone surfaces can be costly to restore if they are stained, etched, or damaged–so we tend to worry constantly about using them! MORE™ Anti-Etch™ is a product that’s supposed to eliminate this worry by preventing etching and staining of your countertops–but does it really work?

Depending on the type of counters you have, the answer is a clear YES. Let’s discuss this question further.

What is Anti-Etch?

MORE Anti-Etch is a product that, when applied to natural limestone-based surfaces, provides a crystal clear, ultra-thin protective barrier that prevents etching and staining from acidic substances like wine, tomato sauce, vinegar, etc. It also makes the surface more resistant to dirt and other wear-and-tear damage. Anti-Etch can be applied on marble, travertine, limestone, onyx, and even concrete, and it’s available for honed, polished, and leathered surfaces. It is an environmentally friendly compound (no VOCs), and it’s safe for all food-grade surfaces. Best of all, it’s long-lasting. Just one application and your counters are protected for up to 10 years!

What Is Etching?

Etching is a type of damage caused by acidic substances that seep into the stone surface and eat away at it. Limestone-based surfaces are particularly vulnerable to acids and bases because they react with the calcium carbonate in the stone, forever changing it. Etches leave behind microscopic “pits” in the surface, which create an uneven discoloration to the countertop that may look like staining, but is actually permanent damage. Once etching occurs, the only way to remove it is by refinishing or restoring the countertop–grinding down the stone to remove the damage and honing it back to the desired sheen.

What makes MORE Anti-Etch so powerful is that it follows the maxim, “An ounce of prevention is worth a pound of cure.” By applying Anti-Etch, you stop etching before it ever starts.

How Anti-Etch Protects Your Countertops

MORE Anti-Etch is more than just a sealant. It forms an invisible barrier on the surface of your counters that prevents acids, bases, and other corrosive substances from coming into contact with the stone. This makes it impossible for etching to occur, even with repeated spills or everyday use. If the acid can’t touch the stone, it can’t react with it. The barrier is so strong that you can leave spills sitting indefinitely without fear or worry! (Not that you would.)

But this invisible barrier does even more to protect your counters than just protect from etching. It also provides protection on the microscopic level from dirt and grime, making the stone surface more resistant to scratching. It also makes your counters hygienically safer because Anti-Etch is completely non-porous–meaning bacteria and germs have nowhere to take hold!

How Long Does Anti-Etch Last?

MORE Anti-Etch is designed to last for up to 10 years with proper application and with normal use. That means that once your stone service professional has applied it to your counters, you can use your marble and other stone surfaces worry-free for up to a decade! And Anti-Etch is easy to reapply; all it takes is a light buffing and a fresh coat of the product, and your counters are set for the next 10 years.

Want to Protect Your Counters?

You installed your stone counters so that you could enjoy them for many years to come: why be afraid to use them? With MORE Anti-Etch, that worry becomes a thing of the past.

For best results, MORE Anti-Etch should only be applied by a trained stone restoration contractor. At Statewide Stone Care, our technicians are highly experienced in all aspects of stone and tile care, restoration, refinishing, and protection in New York and New Jersey–including proper application of MORE Anti-Etch. And if your stone surfaces have already sustained damage, we can perform a complete restoration and refinishing on them to make them as good as new, then apply MORE Anti-Etch to make sure they stay that way. For a free estimate, contact us today.

Best Places For Terrazzo Flooring

Terrazzo flooring in a school

Terrazzo floors are widely used in public spaces, and for good reason: they’re durable, easy to clean and look high-end. But not all terrazzo is created equal. So which type of installation should you choose for your business or home? Here’s a guide to the best places for terrazzo flooring.

Hospitals

Hospitals are one of the most high-traffic facilities in a city. Terrazzo is an excellent flooring option for hospitals because it can withstand heavy foot traffic and still look great. Additionally, terrazzo floors are easy to clean and maintain, making them ideal for any lobby or waiting room setting. In fact, terrazzo floors are often installed in hospital lobbies, as they have a unique look that sets them apart from other common flooring options like marble or granite.

Lobbies

Lobbies can serve many different purposes. They are used as a waiting area for patients, visitors, and staff. Some lobbies also provide seating areas for patients who are waiting to be seen by doctors or other medical professionals. In addition, lobbies often display information about the hospital or clinic’s services and hours of operation, which will bring in traffic from all corners of the hospital or office. Lobbies are also sometimes used as meeting places for groups of people who have appointments at the same time on different floors of a building (i.e., obstetrics-gynecology, pediatrics), meaning that both people and chairs will be moving constantly against the floor. In these high-traffic areas, terrazzo offers color and easy cleaning at a low cost, saving money while looking great.

Airports

Terrazzo floors are an excellent choice for airports, as they’re designed to stand up to heavy traffic and also clean easily. 

The durability of terrazzo floors means that they can withstand the constant wear and tear of airport operations. Terrazzo floors will stand up against shoes, suitcases, luggage carts, and more, all parts of the busy airport environment. Because it’s a stone surface, terrazzo is also less likely than other types of flooring to be damaged by spills or heavy objects being dropped on it.

Terrazzo flooring does not require any special cleaning products when it comes time for maintenance—just a mop and bucket with warm water will do the trick!

Office Buildings

Terrazzo flooring is a great choice for high-traffic areas, and it can be made to resemble other materials. Terrazzo is durable and affordable, making it well suited for commercial settings such as offices.

Terrazzo is an ideal choice for office buildings because of its durability and affordability. It can be made to look like marble, granite, or other natural stones that are more expensive than terrazzo; however, terrazzo has many benefits that make it a better choice than those materials when selecting flooring options for your commercial space. The glass and marble chips in terrazzo flooring give it character and color, and its polished surface lends it a high-end feel.

Schools

Schools are a great place for terrazzo flooring. Schools are typically high-traffic areas, and terrazzo flooring is the perfect choice for its long lifespan and ease of maintenance. It’s also aesthetically pleasing, making it an affordable option that looks like real stone.

Are You Looking For Terrazzo Flooring in Your Building?

Terrazzo floors are durable, beautiful, and easy to clean. They’re suitable for any setting, from hospitals to schools and even homes. Terrazzo is an excellent choice for anyone looking for a long-lasting floor that will last through years of use. If you’re interested in learning more about terrazzo floors for your building, the experts at Statewide Stone Care can help. Contact us today for a free consultation. 

5 Benefits to Choosing MORE™ AntiEtch™

Marble countertop with antietch protection

Your stone countertops are a thing of beauty, and you’d do anything to protect them. You keep them clean, buff them regularly, and seal them periodically to protect them from stains and damage. But the one type of damage that sealers can’t prevent is etchingthe dull marks that occur when acidic substances eat away at the stone surface. When you see the telltale signs of etching, you know you’re looking at a potentially expensive repair.

Unfortunately, even if you avoid using vinegar and lemon cleaners (as well as you should), etching can still occur from acidic foods, drinks, and cooking ingredients that can come into contact with your counters accidentally through regular use. Exposure to wine, lemon juice, coffee, vinegar, and even soda can cause etching of your marble, limestone, or travertine counters.

Fortunately, Statewide Stone Care now offers a treatment specially designed to protect stone countertops against damage from etching: MORE™ AntiEtch™. Developed through the latest technology, this innovative product forms a durable, ultra-thin coating that prevents the toughest stains and caustic solutions from coming in contact with your marble countertop surface. Let’s look at 5 key benefits of choosing this product to protect your countertops.

1. Completely Blocks Stains and Etching

The number one benefit of MORE™ AntiEtch™ is that it provides a 100% effective barrier against staining and etching. Unlike other sealers which provide partial protection at best, this product completely blocks any acidic substance from causing damage to your stone surface.

2. Invisible Protection

MORE™ AntiEtch™ forms an invisible barrier that doesn’t alter the appearance of your stone surfaces. You won’t even know it’s there, except for the absence of etching, of course!

3. Use on a Wide Range of Stone Surfaces

While marble countertops are those most susceptible to etching (or on which etching is most visible), MORE™ AntiEtch™ can be used on virtually any porous surface that is vulnerable to acid etching, including marble, travertine, limestone, and even concrete.

4. Long-Lasting and Durable

This product bonds to your countertop surface on a molecular level, so it provides long-lasting protection against etching. In fact, unlike other types of sealers which must be reapplied every few years, MORE™ AntiEtch™ offers up to 10 years of protection per treatment.

5. Environmentally Friendly and Food-Safe

MORE™ AntiEtch™ is designed to be safe for all food-grade surfaces, so you can rest assured that it won’t leach chemicals into your food. It’s also environmentally friendly, so you can use it with confidence that you’re not harming the environment.

Want MORE™ AntiEtch™ to Make Your Counters Sparkle?

If you’re looking for the perfect solution to prevent etching and staining of your stone countertops, look no further than MORE™ AntiEtch™. To learn more about how this advanced product can protect your countertops for years to come schedule a free quote with the experts at Statewide Stone Care today.


Top 5 Terrazzo Floor Cleaning Mistakes and How to Avoid Them

Terrazzo Professional Clean

Terrazzo is a beautiful flooring material, but it’s also prone to scratches and stains. This makes terrazzo maintenance essential to keep your floors looking amazing. If you want to avoid common mistakes when cleaning your terrazzo floor, follow these tips.

1. Letting the Cleaning Solution Dry on the Floor.

Cleaning solutions should always be rinsed off, as leaving them to dry can cause streaking and dullness on your floor. Even if you’re using a non-abrasive cleaner, you’ll still want to rinse it off after using it because any leftover residue can scratch the surface of your terrazzo floors over time.

Never use abrasive materials to clean terrazzo floors. While some types of dirt may require scrubbing (like dried food or gum), never use anything abrasive (such as scouring powder) when cleaning your floors. This could damage the surface of the material and make them look dull over time.

2. Using Acrylic Floor Finishes.

Acrylic floor finishes are not recommended for terrazzo floors. This is because they can cause damage to the terrazzo, including discoloration, staining, and gloss loss.

3. Using All-Purpose Cleaners.

All-purpose cleaners, such as vinegar or bleach, are not the best choice for cleaning terrazzo floors. These common household products will strip away dirt and grease from your floor, but they can also leave it vulnerable to damage.

All-purpose cleaners are too harsh for your terrazzo floor’s delicate surface and may cause pitting on the surface of the tile if used too often. The residue left behind by all-purpose cleaners attracts dirt so you’ll have to clean more often than you would with a cleaner specifically designed for terrazzo floors.

4. Using Vinegar

Never use vinegar to clean terrazzo floors. Vinegar can damage the finish on your floor and can cause damage to the concrete underneath it. Similarly, oil-based cleaning products will cause permanent discoloration to your terrazzo flooring and should be avoided.

5. Scrubbing With Hard Materials.

When it comes to cleaning terrazzo floors, one of the biggest mistakes you can make is using a brush or mop that’s too rough on the surface of your floors. If you do this, you’ll simply scratch and damage your flooring rather than clean it properly. The best way to avoid this mistake is by using soft brushes and sponges when sweeping or mopping your flooring. You can also opt for softer materials like microfiber cloths, as well as rags made from cotton or polyester blends if you’re looking for something even softer than what we’ve already mentioned here!

Your Terrazzo Floor Will Last a Long Time if You Treat it Properly

Terrazzo floors are a durable and low-maintenance alternative to marble or other natural stone. They are less expensive than porcelain tiles, very easy to clean, and can be used in any room of your home. However, you need to take care of your terrazzo floor properly if you want it to last as long as possible.

Property owners or managers should be conscious of the importance of proper care by cleaning staff who have been trained in cleaning methods for terrazzo floors. Without proper instruction, cleaners can cause damage because of a lack of knowledge. Terrazzo floors should be maintained and cleaned regularly to avoid a buildup of dirt and debris, especially in areas with high foot traffic. Cleaning your terrazzo floor daily will stave off the need for deep cleaning with harsher materials.

Let Our NYC Stone Care Experts Care for Your Terrazzo Floors

These cleaning tips can help you to keep your terrazzo floor looking its best. Remember, no matter what type of flooring you have, it’s important to understand its care and maintenance requirements so that your investment isn’t compromised over time. One way to guarantee longevity for your terrazzo floors is to let our New York City stone care experts regularly clean and maintain your space. At Statewide Stone Care, we know a thing or two about keeping terrazzo clean and strong. Contact us today for a free consultation!

How to Restore a Stone Fireplace

Stone fireplace in a home

Stone fireplaces are a beautiful addition to any home, but they’re also prone to a variety of problems. If your stone fireplace is looking dingy or dirty, follow these steps for restoring it.

Step 1: Do a Visual Inspection.

You’ll want to start by doing a visual inspection of the stone. Look for any cracks, chips, or missing pieces, and see if the color has changed. You don’t have to be Sherlock Holmes to observe this kind of damage—you should be able to tell if there’s discoloration from water damage or mold.

Step 2: Clean With a Homemade Solution.

Make a homemade solution of hot water and trisodium phosphate (TSP). Pour the TSP into a bucket, then add hot water to fill the bucket. Mix well with a long-handled scrub brush or sponge until it dissolves into a sudsy solution. Some people like to add bleach or ammonia to their solutions for extra cleaning power, but these chemicals can damage stones over time if they’re left on too long, so try using them sparingly in this step.

Scrub all surfaces of your stone fireplace with this solution—especially those that are stained or dirty—and let it sit for several minutes before rinsing off the surface completely with clear water until you see no remnants of soap residue left behind on your fireplace wall, surrounds, or firebox flooring area (don’t forget about between each stone!).

Avoid Harsh Chemicals

Avoid using harsh chemicals. While it’s tempting to use bleach or strong detergents when cleaning your fireplace, these harsh products can damage the stone and grout. Instead, use an enzymatic cleaner that will clean effectively without damaging the stone and grout.

Use only soft sponges or cloths when cleaning the fireplace to avoid scratching or marring the surface of your fireplace. Avoid abrasive cleaners, acids, and ammonia as they can damage both your fireplace and yourself!

Step 3: Scrub the Fireplace

Cleaning a stone fireplace can be a daunting task. It’s important to start at the top and work your way down in small sections since you don’t want to damage the firebox or its surrounds. First, you’ll need a soft-bristled brush that you’ll use to brush away any loose dirt without scratching the surface of your stone. Next, wipe away what has been loosened with a clean cloth. Finally, use your soft-bristled brush to clean both sides of each grate individually before cleaning them as one unit together with everything else inside the fireplace itself.

Step 4: Rinse the Fireplace with Warm Water.

Once the solution has dried, rinse the fireplace with warm water. Use a soft cloth to wipe off any remaining residue and let it air dry. If you are using a sponge or brush, scrub in small circles to ensure that every surface gets cleaned thoroughly. Using a soft cloth, dry off all surfaces and make sure no moisture remains inside your fireplace before you put any loose elements back in place.

Step 5: Give the Fireplace a Deeper Clean Occasionally

A more abrasive cleaner can be used to clean the entire fireplace, but you will want to double-check the instructions for the specific product you intend to use. A toothbrush can be used to get into the cracks and grooves of your stone fireplace, while a soft scrubber or sponge can get into the grooves. If you are worried about scratching or damaging your stone fireplace, use a toothbrush instead of an abrasive brush or scrubber.

Step 6: Use Hot Water & Trisodium Phosphate to Scrub, Then Rinse

Use hot water and trisodium phosphate to scrub and then rinse your stone fireplace. Fill a bucket with warm water, add one cup of trisodium phosphate and mix well with a soft brush.

Using a clean cloth, wipe down the entire surface of your fireplace, including uprights and jambs. Rinse with warm water using a soft cloth to dry the fireplace. This process removes any remaining soap residue from the cleaning steps prior to this one.

Now use another clean cloth soaked in plain water to polish your stone surfaces, focusing on areas where smoke accumulations may occur (like along the upper edges of mantels) or areas that are heavily soiled (such as hearths).

Let Our Stone Care Experts Help You Restore Your Fireplace!

The steps above will help you get your stone fireplace looking like new again. If you want to do a deeper clean once in a while, try using hot water and trisodium phosphate. These products are strong enough to remove even the most stubborn stains from your fireplace without damaging the stone itself. However, if these methods aren’t enough and you find that your fireplace stones are damaged, the stone experts at Statewide Stone Care can help! Contact us for a free consultation to restore your fireplace to like-new condition.